Sbriciolare con le mani il Pan di spagna al cioccolato e le meringhe,
mescolarlo a della Nutella fino ad ottenere un impasto abbastanza denso
ma morbido. Mettere in frigo per un'ora.
Dividere l'impasto in pozioni di 10 gr circa (eh già, li ho pesati!!) e
formarne delle palline quindi rotolarli nella granella di nocciola, di
pistacchio e nel cacao..Per alcune mixate le 3 coperture e sentirete che
bontà!!
Disponeteli nei pirottini da cioccolatino.
(io avevo delle meringhette ed ho inserito anche quelle, ma non sono obbligatorie)
Lately—though I don’t quite know why—my favorite kind of candy in the
world is chocolate covered marshmallows. My kids can tell you that I’ll
travel far and wide to buy them, and pay exorbitant prices.
Today I made some homemade marshmallows, and realized it would be
more time and cost effective if I were to dip them in my own chocolate
rather than go and buy them.
This recipe is much easier than you think, and it sets up a lot
faster than some of the other recipes out there—you don’t need to let
them set overnight. Also, I used organic evaporated cane sugar and honey
in these, so they’re almost healthy. Well, not really, but you can tell
yourself that. I always do.
Homemade Chocolate Covered Marshmallows
2 cups evaporated cane juice or granulated sugar
1 1/4 cup water
2 tablespoons honey
4 packets unflavored gelatin
2 egg whites
2 teaspoons pure vanilla extract
confectioner’s sugar
12 ounces good quality dark chocolate, chopped or 2 cups chocolate chips
1. Spray a 13×9 inch pan (or slightly smaller), with non-stick
cooking spray. Set aside. In a medium saucepan, combine the sugar, 3/4
cup of water, and honey. Bring to a boil over medium high heat and boil
until the sugar mixture reaches 230 degrees (the soft ball stage).
2. While the sugar and water come to a boil, sprinkle the gelatin
over the remaining 1/2 cup of water in a small bowl, and let bloom
(dissolve). Put the egg whites in the bowl of an electric mixer, and
beat on high until stiff peaks form.
3. When the sugar mixture comes to temperature, remove from heat and
whisk in the gelatin mixture. With the mixer on medium-low, slowly
pour in the sugar and gelatin mixture, and add in vanilla. Slowly raise
the speed to high, and beat for 10 minutes.
4. When the marshmallow has whipped for 10 minutes, pour into the
prepared pan. Working quickly, use wet hands to press the marshmallow
into the pan. Use a wet spatula to smooth the lumps. Let sit on the
counter, uncovered, for 1-2 hours. Cut into squares with a wet knife and
toss with confectioner’s sugar. Tap off excess sugar.
5. In a medium size microwave safe bowl, heat the chocolate in 20-30
second intervals, stirring well after each. Use a skewer to dip the
marshmallows in the chocolate. Set on a baking sheet lined with
parchment paper. Refrigerate until set, about 20 minutes.
2 cans (14 oz each) sweetened condensed milk (not evaporated)
5 boxes (6 oz each) white chocolate baking squares, chopped
1 1/4 teaspoons vanilla
liquid food color (red, blue, green and yellow)
Directions
Line 9 x 5-inch loaf pan with foil.
Divide sweetened condensed milk between 5 microwave-safe small bowls, about 1/2 cup per bowl.
To make the bottom PURPLE layer, add 6 ounces of
chopped white chocolate to one bowl of the sweetened condensed milk.
Microwave uncovered on High 1 minute; stir until smooth. Stir in 1/4
teaspoon vanilla. Tint PURPLE by adding 9 drops of red food color and 6
drops of blue food color; stir well. Immediately pour fudge mixture in
the bottom of a foil lined pan, spreading to edges. Firmly tap pan on
counter to even out layer. Place in freezer for at least 15 minutes or
until top appears set.
For the BLUE layer, add 6 ounces of chopped white
chocolate to one bowl of the sweetened condensed milk. Microwave
uncovered on High 1 minute; stir until smooth. Stir in 1/4 teaspoon of
vanilla. Tint BLUE by adding 18 drops of blue food color; stir well.
Gently pour and spread mixture over PURPLE layer in pan. Firmly tap pan
on counter to even out layer. Place in freezer at least 15 minutes or
until top appears set.
For the GREEN layer, add 6 ounces of chopped
white chocolate to one bowl of the sweetened condensed milk. Microwave
uncovered on High 1 minute; stir until smooth. Stir in 1/4 teaspoon of
vanilla. Tint GREEN by adding 18 drops of green food color; stir well.
Gently pour and spread mixture over BLUE layer in pan. Firmly tap pan on
counter to even out layer. Place in freezer at least 15 minutes or
until top appears set.
For the YELLOW layer, add 6 ounces of chopped
white chocolate to one bowl of the sweetened condensed milk. Microwave
uncovered on High 1 minute; stir until smooth. Stir in 1/4 teaspoon of
vanilla. Tint YELLOW by adding 12 drops of yellow food color; stir well.
Gently pour and spread mixture over GREEN layer in pan. Firmly tap pan
on counter to even out layer. Place in freezer at least 15 minutes or
until top appears set.
For the top RED layer, add 6 ounces of chopped
white chocolate to one bowl of the sweetened condensed milk. Microwave
uncovered on High 1 minute; stir until smooth. Stir in 1/4 teaspoon of
vanilla. Tint RED by adding 18 drops of red food color; stir well.
Gently pour and spread mixture over YELLOW layer in pan. Firmly tap pan
on counter to even out layer.
REFRIGERATE at least 12 hours until cold and
firm. Cut into 8 rows by 4 rows, trimming edges as desired. If fudge
becomes soft during slicing, return to refrigerator to firm up. Store
covered in the refrigerator.
Color
your holiday world like never before with this Rainbow Fudge recipe
from our Secret Stash collection — just for Tablespoon.com members!
Fudge is the staple of holiday staples. Dark and rich, it finds its place on cookie plates everywhere this time of year.
But wait! This fudge, this brilliantly bright and bold Rainbow Fudge,
will not only color your holiday like a crazy case of Crayolas, it’ll
rock your Christmas socks and blow the fuse on Rudolph’s nose! What a
super wonderific choice to take to a holiday party.
Come along with Team Tablespoon as we pair up with our kitchen-expert
pals down in the Betty Crocker Test Kitchens to make this incredible
treat.
Get Prepped
First, organize your stuff. We got down to the kitchen, and this was the scene — the ingredients were all ready to go:
And there were 5 beautiful clear bowls lined up in a neat row with about 1/2 cup of sweetened condensed milk in each.
We learned how to line a loaf pan with foil the right way, like this:
So now we’re set to make a rainbow!
Melting, Mixing and Colorizing
Grab the first of your five boxes of white baking chocolate. White
chocolate can be finicky — we found Baker’s works really well.
We’ll do one color at a time, so chop up one box of white chocolate at a time.
Add the chopped white chocolate to the sweetened condensed milk in one of the bowls.
Microwave the sweetened-condensed milk and the chocolate choppings on high for 1 minute.
Stir ’til smooth. Getting sweet enuf for ya yet? Just wait … it gets better!
Add 1/4 tsp. vanilla and stir again.
Now Let’s Start the Layers
Time to get our colors on. We’ll begin with purple layer ‘cuz we’re laying down the colors in reverse order.
Purple Layer
Using regular food colors, add 9 drops of red and 6 drops of blue.
Stir …
Keep stirring until completely combined.
Pour that into the prepared loaf pan and spread it to the edges.
Tap the pan on the counter to make it burp up the air bubbles. Thwack
it nice and flat onto the counter a few times. Air bubbles = holes in
the fudge, and we don’t want that!
Then put it in the FREEZER for 15 minutes or until the top appears set. This step is super important because it keeps the layers separate.
And the pretty purple layer is done!
Blue Layer
Now you’re gonna do that exact same thing for all the other colors.
So, chop the chocolate, microwave and melt it with the sweetened condensed milk. Add the vanilla, then add 18 drops of blue food color to get the blue layer.
Tap it on the counter to release the air bubbles and return it to the FREEZER for 15 minutes. Beautiful blue layer … done!
Green Layer
Gumby layer, comin’ up! Same process as before, but add 18 drops of green food color this time.
Tap it on the counter, and return it to the FREEZER for 15 minutes. Gorgeous green layer … done!
Yellow Layer
Here comes the sun! Same process as before, but add 12 drops of yellow food color this time.
Tap it on the counter and return it to the FREEZER for 15 minutes and … the yellow layer’s done!
Red Layer
Rad red on its way! Same process as before, but add 18 drops of red food color.
Tap it on the counter to release the air bubbles like usual, but this time you’re going to refrigerate it instead of freeze it — so place it in the REFRIGERATOR for at least 12 HOURS to harden the whole rainbow brick up.
Finishing it Up
After the rainbow brick has been refrigerated at least 12 hours to
firm up, take it out of the fridge and remove the fudge from the pan,
foil and all.
Carefully remove the foil from the fudge. The foil can stick, but don’t worry. Just take your time and peel it away.
Flip ‘er over and keep peeling…
Then trim the edges so you have straight sides.
We cut it into rectangle slices, but you can cut it into any size pieces you want.
To make rectangles like we did, mark off about 1″ intervals both
directions. No need to be perfect. Just eyeball it up or use a ruler if
you want.
Then cut your colorful fudge brick into pieces to share.
This fudge is softer than typical fudge, so use a sharp knife. If it
gets too soft to slice easily, just return it to the fridge to firm up a
bit more.
Oh, yah, baby … this is gonna totally make you the bestest guest at the party.
Now, there’s only one thing left to do — clean up the prettiest kitchen mess ever.
Here’s the full recipe, so go color your holiday fun!
Red, orange, yellow, green, blue, and purple food colors (the gel version works well here)
Parchment paper
16 ounces dipping chocolate
Directions
In the large bowl of a stand mixer (you can
also use a hand mixer), beat 4 1/2 cups of the powdered sugar with corn
syrup, water, peppermint extract, and shortening at medium speed until
just combined. Knead on a work surface dusted with remaining 1/2 cup of
powdered sugar until smooth. If it's not dough consistency add a tiny
bit of water until it's workable.
Divide dough evenly into 6 balls. In a small
bowl, color each ball red, orange, yellow, green, blue, and violet
respectively. Remember that adding food coloring could make your ball a
little too wet, so feel free to add more powdered sugar here until the
ball is workable and not sticky.
Take one ball at a
time, roll it into a snake shape, place it in between two sheets of
parchment paper, and roll it into a rectangle about 11"x5". Place each
sheet of dough in the fridge to chill for about 15-20 minutes.
Once
dough has chilled, remove the parchment from each layer (leaving one
layer on the bottom so it doesn't stick to your surface) and stack each
layer on top of the other in the order of red, orange, yellow, green,
blue, purple. Chilling the dough allows the parchment paper to be
removed without tearing the dough. If the dough begins to tear, chill
the dough longer.
Once the layers have been stacked on top of each other, slightly roll them to get rid of any air bubbles.
Trim
the long end of one side with a sharp knife so that you have an even
edge to begin rolling. Starting with the long side, begin rolling the
dough using the parchment paper to help roll. If your dough is too hard
here, let it soften a bit before rolling. Then freeze the roll of dough
until hardened (about an hour).
When log is
frozen, cut into 1/4 inch circles. Turn the log after each couple of
slices to keep the log round because the pressure of the knife can make
the log turn oblong.
Melt dipping chocolate
according to the package directions. Using a fork, dip one pinwheel,
shaking the excess off and letting it set on parchment lined cookie
sheets. Repeat with all of them. Return them to the freezer to chill if
they get too soft.
Place patties in the fridge or freezer to set. Store patties in between layers of parchment paper so they don't stick.
They’re different in a good way, like getting a handwritten note instead of an email/text/tweet. Right? #Right.
Handwritten says you care enough to make an above-and-beyond effort. At least $0.45 worth of effort, and even more if the envelope is square (how do they get away with that, anyway?).
Handmade gifts are the same way. They’re more personal, and I think
they’re more fun to give as well. It’s pretty great to see a gift you
made yourself being enjoyed.
Now, connect that personal touch to the realms of hunger and thirst,
and you’re golden! The quickest way to someone’s heart is directly
through the taste buds, after all.
So this year, Do. It. Yourself. Make a gift they’ll love getting!
7 Ways to Give Goodness
1) DIY Peppermint Patty Candyby Hanielas
Ever experience your gift being shoved in other people’s
faces? It’s rewarding. “See? It’s striped on the inside! Wow, (you)’re
so talented/creative/amazing!” Yeah, you know.
2) DIY Rainbow Candyby GirlWhoAteEverything
“Oh, how nice. Mints…” Then they take a chomp and WHOA! It’s “what does it mean?!” all over again.
3) DIY Bittersby Nybarfly
Have a cocktail enthusiast on your list? Make your
mixologist merry with this recipe for aromatic bitters. It’s in some of
the best drinks (IMHO), and they’ll appreciate having a super secret
sauce in their corner.
4) DIY Ice Cream Kitby Family Bites
Adorable, no? Especially for those of us who eat ice cream
in the winter. What? It’s not weird. Just make sure this present stays
at the top of the pile, unless you want cone crumbles as an additional
topping. Mmm. That actually sounds pretty good…
5) DIY Cocoa Snowman in a Jarby The Decorated Cookie
Maybe you’ve gotten homemade cocoa before; for many kids it’s the first gift they make. Up the ante with an entire snowman!
6) DIY Irish Creme Liquorby TbspAna
There are many ways to get through winter, making hot boozy
drinks is one. Many have Irish creme liquor as a central ingredient. Add
a fireplace and before you know it, it’s spring and the birds are
tweeting…wait, wake up! You dozed off. And your socks are smoking.
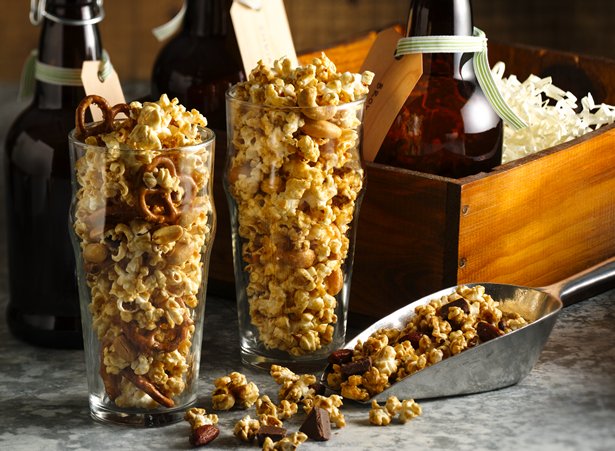
7) DIY Beer Caramel Cornby Red Hot Holiday Trends / Betty Crocker
Beer. Caramel corn. They’re better together, especially when they’re this close. This is basically the Batman and Robin of snacks. Perfect for movie night. Or…any night.
There you have ‘em; 7 ideas for giving away goodness.
Go forth and DIY!
Today I'll share with you a no bake treat that is really easy to make,
packed with minty flavor and has a colorful surprise inside.
I make these every year and everyone loves them. This year I made a
double batch and it looks like I'm running low already!!! Though they
look complicated at first, once you get the know-how, they are pretty
easy to make. I use good quality peppermint or mint extract when I make these, and
remember less is more when it comes to mint, I'd say absolute maximum
is 1tsp extract for this recipe if using oils be sure to use drops not
teaspoons.
Candy Cane Peppermint Patties
2 1/2 cups confectioners sugar (less than 1 pound), divided
1 1/2 tablespoons light corn syrup
1 1/2 tablespoons water
1/2 teaspoon pure peppermint extract / if you
prefer more minty flavor, use more extract, I used mint extract and it
worked well too, if you have peppermint oil, you can also use that, but
be careful, oils may have stronger flavors/
10 ounces dipping chocolate wafers, such as Merckens
Beat 2 1/4 cups confectioners sugar with corn syrup, water,
peppermint extract, shortening, and a pinch of salt using an electric
mixer (with paddle attachment if using a stand mixer) at medium speed
until just combined. Knead on a work surface dusted with remaining 1/4
cup confectioners sugar until smooth.
Divide filling dough into half, color one dough red, and second leave white.
-Roll
each dough individually between two pieces of parchment paper.The
layers should be fairly thin. You need to make sure that layers of each
dough are similar in size. I found that it helps to roll each dough
into a "snake" shape of certain length and then just roll into a
rectangle shape. Chill for a little bit /5 minutes/ we are going to
stack 2 layer on the top of each other and then roll them into a log.
You need to chill the rolled layers because when chilled it is much
easier to peel of the parchment paper and stack them on the top of each
other, otherwise you end up breaking the dough and we don't want that
to happen.
Once you have your layers chilled we will assemble the Peppermint Pattie log
-line your surface with a piece of wax paper
-stack
both layers, white and red on top of each other, peeling the parchment
papers off, stacked layers should be sitting on a piece wax paper that
you used to line your work surface
-once
you have 2 layers stacked, use a rolling pin and just very gently roll
the pin using slight pressure just to even the dough out, this will
also help with eliminating any air cavities between individual
layers.If needed let the layers soften a little before the second step.
-Now
comes the tricky part, in order to roll 2 layers into a Peppermint
log they have to be soft enough so they don't break in the process but
not too soft or it is impossible to roll(I know I told you to chill them
first, but that was for a another reason, so you could peel off the
parchment paper). Let them soften a little bit, and roll 2 layers into
one larger log.Use the bottom wax paper to help you start, gently lift
the wax paper to start with the rolling, if it looks like it is tearing a
little just work your way until you have a one log, at the end it will
come together, the dough is pretty soft, and any small tears you'll
see can be easily smoothed out, once done roll the log using palms
of your hands to achieve the even thickness shape, but don't push too
hard, just very gently, at this point dough will be soft.Wrap the log
with parchment paper or wax paper/ plastic wrap works too and freeze
until hard.
When frozen, unwrap the Peppermint Pattie log and
using a sharp knife cut the mint patties into about less 1/4 inch
thick, you might want to turn the log slightly each time you cut 2
patties, to ensure similar shapes.
Melt the Chocolate wafers and dip each round into the chocolate, using a
large dipping fork or a meat fork(works great), gently shake of the
excess and place freshly coated patties onto the tray lines wit wax
paper. Once you are done with all the patties, put the tray into the
fridge for 10 minutes to harden the chocolate.
Store mint patties in a cool place in an airtight container, layered, wax paper between each layer.
Peppermint patties are one of those mystical treats. I never really
understood what they were actually made out of—only that I loved eating
them. The idea of making them on my own seemed overwhelming and
difficult, but actually seeing what went into them made me feel like I
could do it.
Then I got a little overly confident and had a harebrained idea of
trying to make them rainbow striped inside. What??!! Yes, you can do it.
And you’ll blow minds!
Start off by making the dough and dividing it evenly into six balls.
Next, color each ball one of the colors of the rainbow. I found that
Betty Crocker’s gel food coloring works well here; it’s neater and
doesn’t add as much additional liquid to our dough. I tried mixing the
dough with my hands but using a bowl with a spoon was faster and less
messy.
Roll each ball in between two sheets of parchment paper. Since we’re
trying to create a uniform rectangle with all of the colors, it helps to
first roll the dough into a snake first and go from there.
I rolled each into about an 11″ by 5″ rectangle.
After you’ve chilled each of the layers, stack them together and give
them a gentle roll with the rolling pin to get rid of any air. I
trimmed off the edge that I was going to use to start rolling so I had
an even start.
Begin rolling with the long edge, using the parchment paper to ease it along.
Once it’s chilled you have a beautiful rainbow colored pinwheel!
Slice the pinwheel into 1/4 inch slices for dipping.
Using a fork, dip each pinwheel in melted dipping chocolate. Work fast so that your pinwheels don’t start getting soft.
Place the dipped pinwheels on parchment or wax paper and then let them set up in the fridge or freezer.
These gorgeous Rainbow Peppermint Patties are great to give to your
friends and family. They’ll be wowed—look how amazing the inside looks! I
still can’t believe I made these.
Bitters are a pungently-spiced ingredient that will add a punch of flavor to your drink with only a few dashes
Wait, there's more! Read the blog post about this recipe.
5 minutes
5 minutes
3 cups
Ingredients
1 medium orange
1 bottle (750ml) grain alcohol (or vodka)
40 drops gentian extract
1 teaspoon whole black peppercorns
1 cinnamon stick (approx. 3-inches)
1 piece fresh ginger, cut in half (approx. 1-1/2 inch)
4 whole allspice berries
4 whole cloves
Directions
Remove the orange zest in strips with a vegetable peeler. Disgard the white pith.
Combine
the zest and all remaining ingredients into a quart jar with a tight
fitting lid. Close and store at room temperature. Let steep for 2 weeks
(if you are using vodka, let steep for 3-4 weeks). Shake the jar every
other day.
Using a coffee filter placed in your strainer, strain alcohol from the spices and store in a tightfitting lid in a dark place.
This is the last post in my homemade gifts/Canada Day entertaining series.
We made this DIY ice cream sundae kit for friends. We thought it
would be super fun for them to take to their cottage. All they need to
supply is the ice cream, and they will be set for some sundae making
fun.
I picked up some waffle cone bowls, sugar cones and assorted candies
and repackaged everything in clear cello bags with colourful labels and
bakers twine. I then made some homemade chocolate sauce, jarred it, and
packaged everything together in a little gift box. It was so simple to
put together and the recipients were thrilled, which was the whole
point.
We're all officially on summer vacation now and plan on spending the
rest of this week curled up watching movies, play board games, roasting
marshmallows and swimming. Come back tomorrow to see if you're a winner
in the Cadbury bicycle factory giveaway.
Easy Chocolate Sauce
1/2 cup heavy cream
3 tablespoon of butter
3 tablespoons corn syrup
6 oz chocolate chips
Combine cream, butter and corn syrup in a small saucepan and heat until the butter had melted and the sauce is almost boiling.
Remove from the heat and add the chocolate, stirring until melted.
Cool to lukewarm and spoon into glass jars. Cover with a tight fitting
lid and store in the fridge.
To use, remove from the fridge and let it sit out at room temperature
for 1 hour prior to serving, or heat for 15 seconds in the microwave.
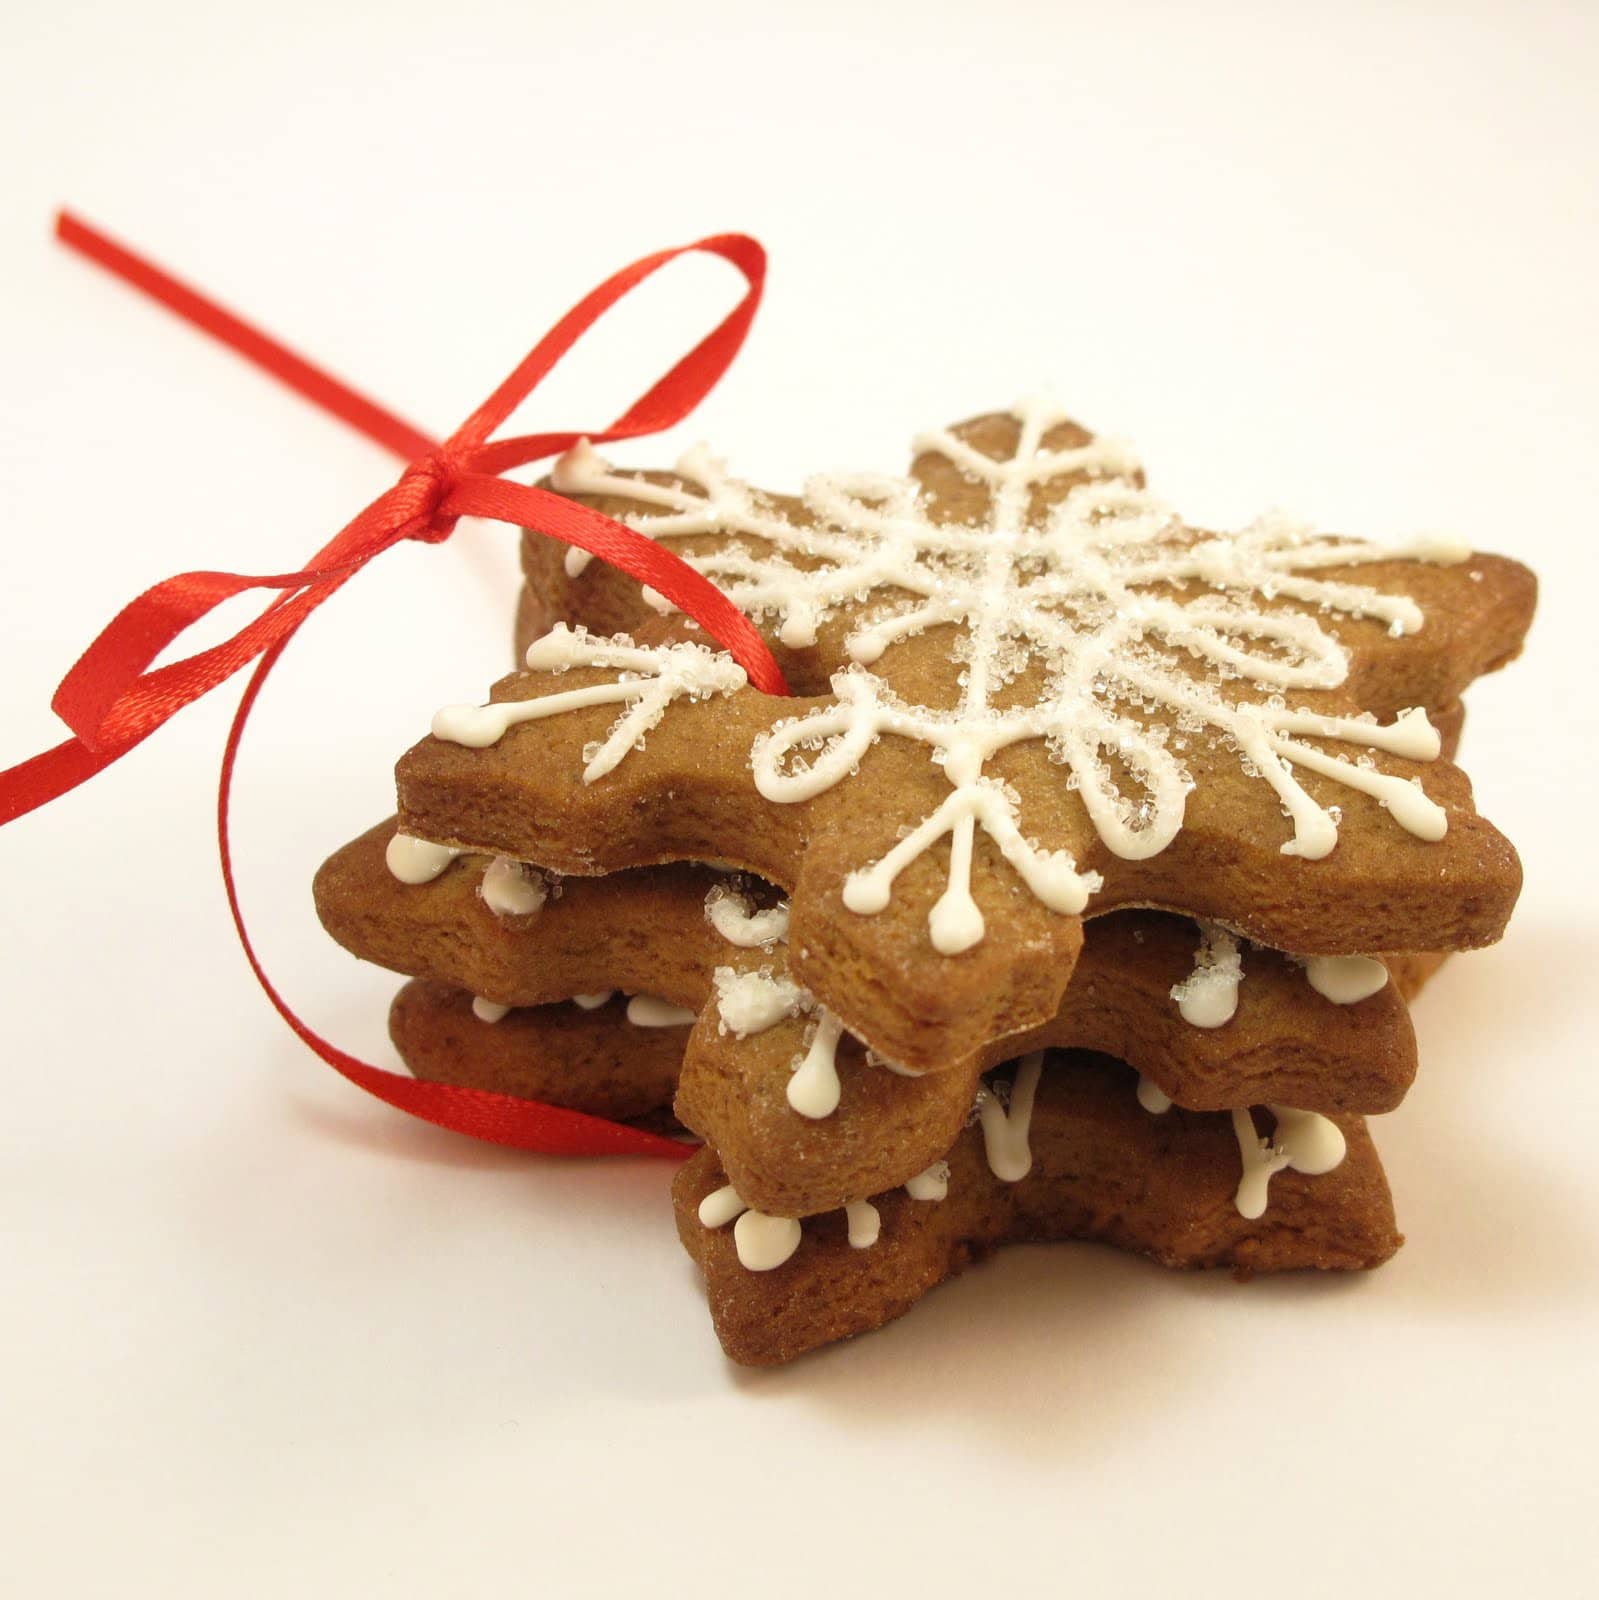
I
made a batch of gingerbread snowflake ornaments for cookie gifts this
year, and since no one can escape my newfound love of painting
marshmallows, I ended up adding a mason jar o’ warmth to go with them.
I used a gingerbread cookie recipe from Williams-Sonoma (link
provided below), then filled a mason jar with snowman marshmallows and
hot cocoa. I added a recipe tag, slapped on a sticker and all done. how to make gingerbread snowflake ornaments
you will need
gingerbread recipe icing
snowflake cutter (mine was about 2 1/2 inches) straw
one frosting bag, coupler and size “3″ tip
white frosting color
white sanding sugar or sprinkles thin ribbon
cellophane favor bags
what to do
Prepare gingerbread recipe. Roll about 1/4-inch thick and place on
parchment paper lined baking tray. Make holes with the straw and bake as
directed by the recipe. Let cool. Tint frosting white and prepare a
frosting bag with size 3 tip. Fill with white frosting and tie closed
with a rubber band. Working with one cookie at a time, pipe snowflake
designs and immediately sprinkle with sanding sugar or sprinkles. Let
dry overnight.
To package, string ribbon through several cookies and tie. Place the
cookies in a cellophane bag and tie closed with another piece of ribbon.
how to make snowman hot cocoa mason jars
you will need
mason jars marshmallows
black and orange edible pens (I suggestAmericolor gourmet writers) hot cocoa mix
cellophane favor bags
tags, stickers and ribbon (optional)
what to do
use markers to make snowman faces on marshmallows. Let dry about an
hour. Fill a favor bag with some hot cocoa mix (I used about a cup) and
twist closed with a tie. (I used the favor bag instead of putting right
in the jar to keep things tidy, but you can also just add the mix right
to the jar.) Place the favor bag of cocoa in the jar with the tied area
in the middle at the top. Place marshmallows around the top of the cocoa
facing out of the jar. Close with lid.
If desired, add your own personalized sticker to the top of the jar,
or attach a tag with the cocoa recipe using a piece of card stock, a
hole punch and a piece of ribbon. another mason jar idea
And here’s another bonus idea for your leftover mason jars: pretzel
rods. I used small pretzel rods, dip in melted white chocolate and
coated with sprinkles. These mini rods fit perfectly in the jar.
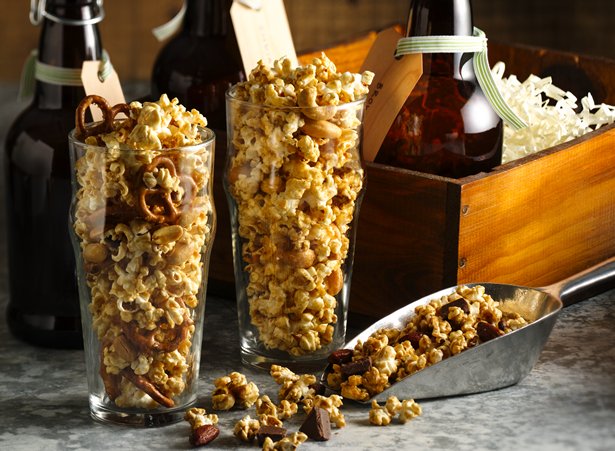
Red Hot Holiday Trends - This
salty-sweet mix has all the highlights of happy hour: popcorn, pretzels,
cocktail peanuts and beer.
PREP TIME35 Min
TOTAL TIME1 Hr 55 Min
SERVINGS16
8 cups popped popcorn
1 cup mini-pretzel twists
1/2 cup salted cocktail peanuts
1/2 cup brown ale beer
1/4 cup packed brown sugar
1/4 cup brown rice syrup or corn syrup
3 tablespoons butter
1/4 teaspoon salt
1
Heat oven to 300°F. Line two 15x10x1-inch pans with foil. Spray foil with cooking spray.
2
In large bowl, place popcorn, pretzels and peanuts; set aside.
3
In
2-quart saucepan, heat ale over medium heat, stirring frequently, until
reduced to 1/4 cup, about 6 minutes. Pour into glass liquid measuring
cup to confirm measure. Add back to saucepan. Stir in brown sugar, syrup
and butter. Cook over medium heat until bubbly around edges, stirring
occasionally.
4
Reduce
heat to medium-low; cook about 5 minutes longer, stirring occasionally,
until thickened and syrupy. Remove from heat; carefully stir in salt.
Pour over popcorn mixture in bowl; toss until evenly coated. Spread
popcorn mixture in pans.
5
Bake
20 minutes, stirring every 5 minutes, to caramelize mixture. Cool
completely, about 1 hour. Break into pieces. Store in airtight
container.
Expert Tips
Brown ale is a style of beer that is lightly hopped,
very full-bodied, slightly sweet and dark brown in color. The color and
flavor are derived from caramelized malts.
Brown rice syrup is a sweetener derived from brown rice.
It has mild malty notes that enhance the beer flavor in this recipe. It
is available at large supermarkets or specialty shops.
Need a gift for a beer lover? Package a bag of this salty-sweet mix and a bottle of brown ale for a great gift!
Use a bag or popped sea salt popcorn to save some time.
Interested in a non-alcoholic version? Root beer or cola can easily be substituted for the beer.
Got questions? Our experts have the answers. Ask Betty now.
Nutrition Information:
1 Serving (1 Serving)
Calories 130
(Calories from Fat 60),
Total Fat 7g
(Saturated Fat 2g,
Trans Fat 0g),
Cholesterol 5mg;
Sodium 110mg;
Total Carbohydrate 13g
(Dietary Fiber 1g,
Sugars 6g),
Protein 2g;
Percent Daily Value*:Exchanges:
1/2 Starch;
0 Fruit;
1/2 Other Carbohydrate;
0 Skim Milk;
0 Low-Fat Milk;
0 Milk;
0 Vegetable;
0 Very Lean Meat;
0 Lean Meat;
0 High-Fat Meat;
1 1/2 Fat;
Carbohydrate Choices:
1;
*Percent Daily Values are based on a 2,000 calorie diet.
Red Hot Holiday Trends - Stout beer,
roasted almonds and plenty of milk chocolate chunks make this caramel
popcorn an irresistible snack.
PREP TIME35 Min
TOTAL TIME1 Hr 55 Min
SERVINGS14
8 cups popped popcorn
1 cup roasted salted almonds
1/2 cup stout beer
1/4 cup packed brown sugar
1/4 cup brown rice syrup or corn syrup
3 tablespoons butter
1/4 teaspoon salt
1 cup chopped premium milk chocolate (6 oz)
1
Heat oven to 300°F. Line two 15x10x1-inch pans with foil. Spray foil with cooking spray.
2
In large bowl, place popcorn and almonds; set aside.
3
In
2-quart saucepan, heat beer over medium heat, stirring frequently,
until reduced to 1/4 cup, about 6 minutes. Pour into glass liquid
measuring cup to confirm measure. Add back to saucepan. Stir in brown
sugar, syrup and butter. Cook over medium heat until bubbly around
edges, stirring occasionally.
4
Reduce
heat to medium-low; cook about 5 minutes longer, stirring occasionally,
until thickened and syrupy. Remove from heat; carefully stir in salt.
Pour over popcorn mix in bowl; toss until evenly coated. Spread popcorn
mixture in pans.
5
Bake
20 minutes, stirring every 5 minutes, to caramelize mixture. Cool
completely, about 1 hour. Break into pieces; stir in chocolate. Store in
airtight container.
Expert Tips
The sweet milk chocolate balances the dark and bitter
flavor of the stout beer. Milk chocolate chips can be used in place of
the chocolate chunks.
Brown rice syrup is a sweetener derived from brown rice.
It has mild malty notes that enhance the beer flavor in this recipe. It
is available at large supermarkets or specialty shops.
Need a gift for a beer lover? Package a bag of this tasty mix and a bottle of stout beer for a great gift!
Interested in a non-alcoholic version? Root beer or cola can easily be substituted for the beer.
Red Hot Holiday Trends - Sweet caramel
popcorn gets spiked and spiced with a pour of IPA beer and a hint of
garam masala.
PREP TIME35 Min
TOTAL TIME1 Hr 55 Min
SERVINGS14
8 cups popped popcorn
1 cup cashews
1/2 cup India pale ale beer
1/4 cup packed brown sugar
1/4 cup brown rice syrup or corn syrup
3 tablespoons butter
1/2 teaspoon garam masala
1/4 teaspoon salt
1
Heat oven to 300°F. Line two 15x10x1-inch pans with foil. Spray foil with cooking spray.
2
In large bowl, place popcorn and cashews; set aside.
3
In
2-quart saucepan, heat ale over medium heat, frequently, until reduced
to 1/4 cup, about 6 minutes. Pour into glass liquid measuring cup to
confirm measure. Add back to saucepan. Stir in brown sugar, syrup and
butter. Cook over medium heat until bubbly around edges, stirring
occasionally.
4
Reduce
heat to medium-low; cook about 5 minutes longer, stirring occasionally,
until thickened and syrupy. Remove from heat; carefully stir in garam
masala and salt. Pour over popcorn mixture in bowl; toss until evenly
coated. Spread popcorn mixture in pans.
5
Bake
20 minutes, stirring every 5 minutes, to caramelize mixture. Cool
completely, about 1 hour. Break into pieces. Store in airtight
container.
Expert Tips
India pale ale is a style of beer that is pale to deep
amber in color and slightly more hoppy and bitter than other pale ale.
Garam masala is an Indian spice mixture. While its
recipe is variable, garam masala usually consists of cardamom, cinnamon
and cloves and may also include coriander, cumin, nutmeg, mace or
pepper.
Brown rice syrup is a sweetener derived from brown rice.
It has mild malty notes that enhance the beer flavor in this recipe. It
is available at large supermarkets or specialty shops.
Need a gift for a beer lover? Package a bag of this spiced mix and a bottle of IPA for a great gift!
Interested in a non-alcoholic version? Root beer or cola can easily be substituted for the beer.