AMICI

Votamiiiiiiiiiiiiiiiiiiii

Visualizzazione post con etichetta Tarte e Crostate. Mostra tutti i post

12 febbraio 2013

Apple Pie Recipe

http://www.cookuk.co.uk/images/apple-pie/recipe_apple_pie_16_large.jpg


This delicious apple pie recipe is very easy to follow and we help you with detailed pictures, instructions and those valuable cook's tips to make a good job of it.


This article gives you all of those and leads you through the process of making top quality apple pie with colour pictures at each vital stage of the recipe, twenty pictures in total!

Preparation Time:  30 minutes  Cooking Time:  50 minutes
 How Difficult  Medium  Freeze?  Yes

 Servings
 4 portions

INGREDIENTS

The ingredients in this recipe (see below) will make a medium sized apple pie, enough for six people.
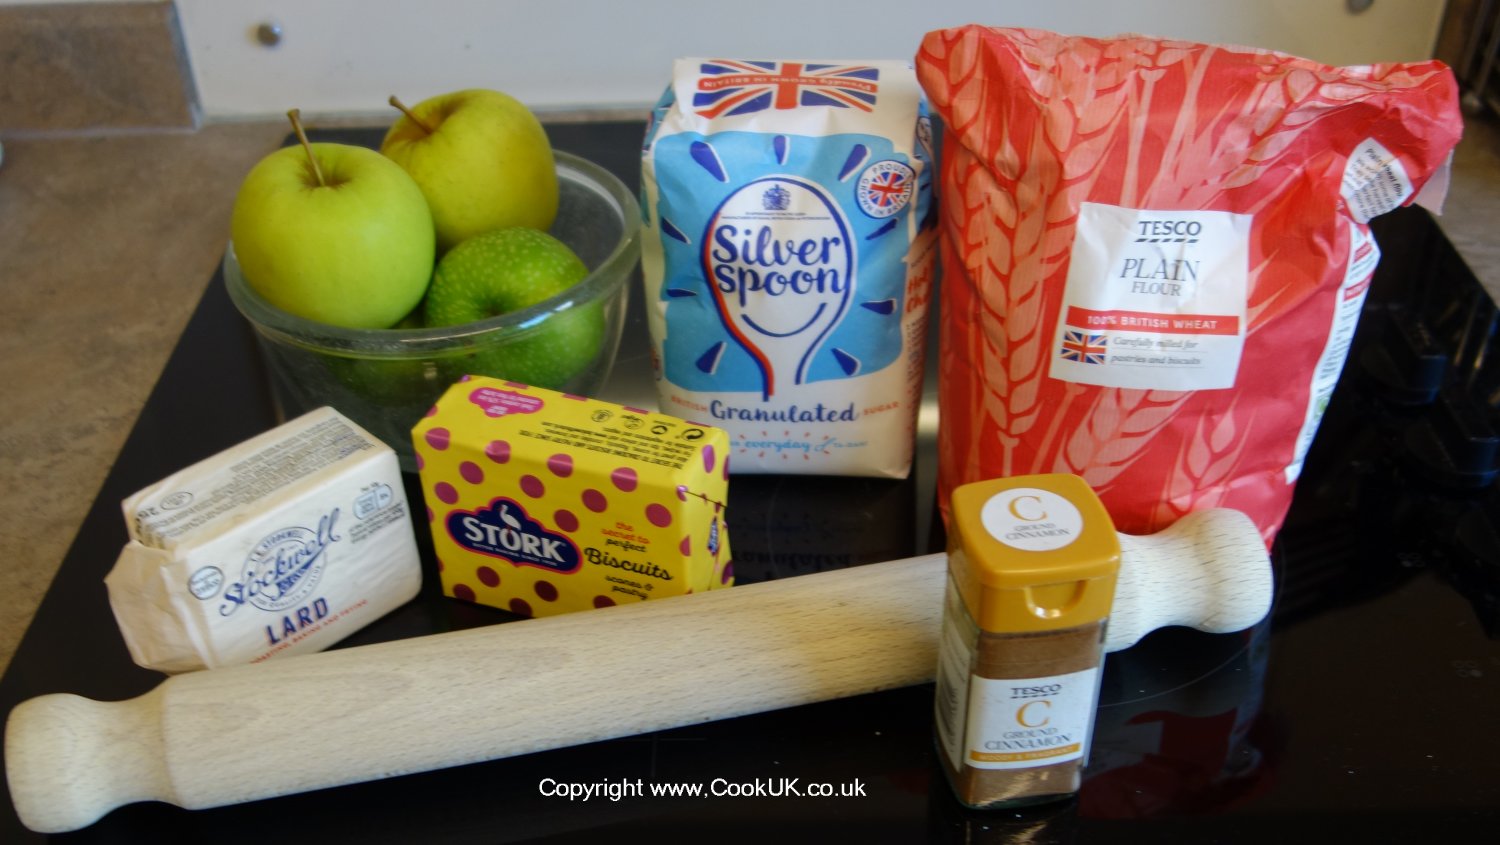

3 to 4 medium cooking apples
110 grams / 4oz cooking margarine (e.g. Stork), but see note below ***
220 grams / 8 oz plain flour
90 grams / 3 oz normal sugar (amount depends on how sweet the apples are).
 *** You can obtain a lighter pastry mix by using 2 ounces (55 grams) of Stork and 2 ounces (55 grams) of refined vegetable fat (e.g. Cookeen). Our pictures for this apple pie recipe show this mixture.

COOKING EQUIPMENT

1 Medium-sized oven-proof dish
Scales
Knife, fork
Rolling pin

Notes for the Cook Before Starting

When apples are peeled and especially when sliced, their attractive white colour will very quickly turn a 'not-so-attractive' brownish colour. This makes absolutely no difference to the taste, but 'looks' are important. The method described below therefore leaves the peeling and cutting of the apples to the last minute.
Step by step pictures on making the shortcrust pastry are shown below but you can also view our video below for a practical demonstration.

COOKING METHOD
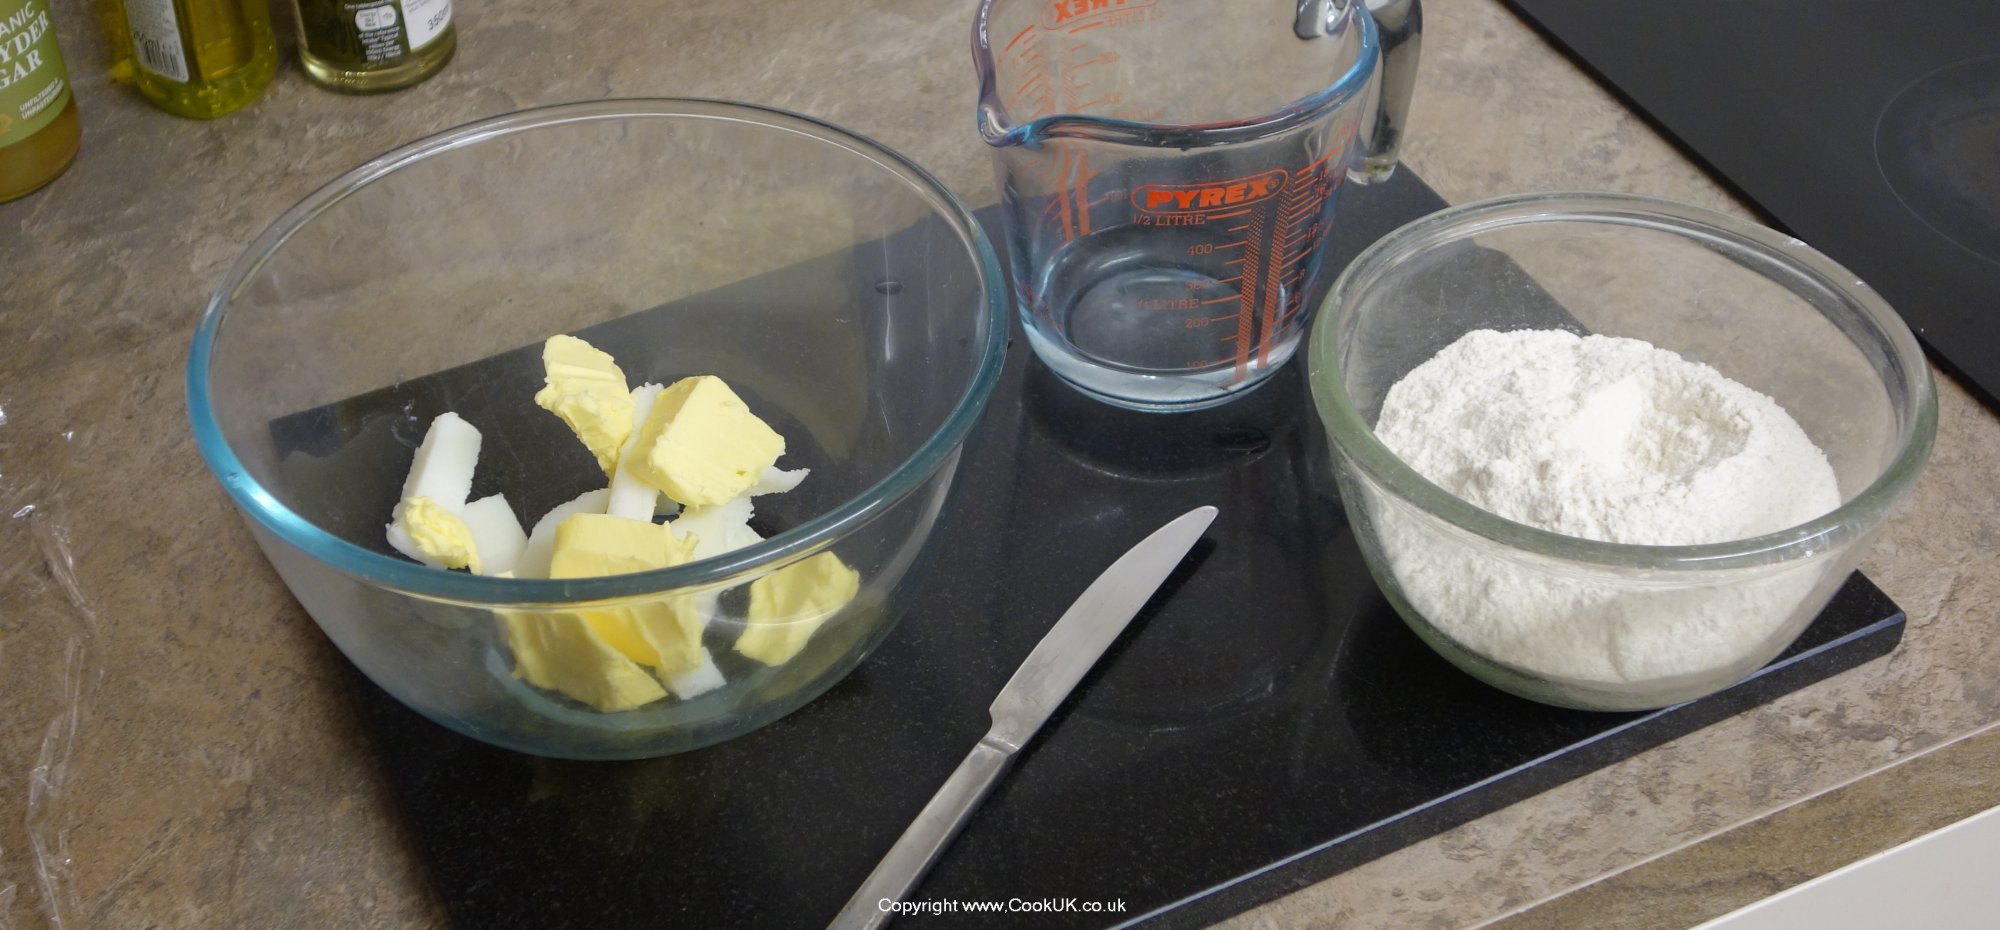
Margarine and vegetable fat First, you need to make the pastry which will form the base and the top of the apple pie. Put the margarine and vegetable fat in a mixing bowl and pour in the flour. The yellow 'bricks' in the picture are margarine, the white bricks are the vegetable fat.
 
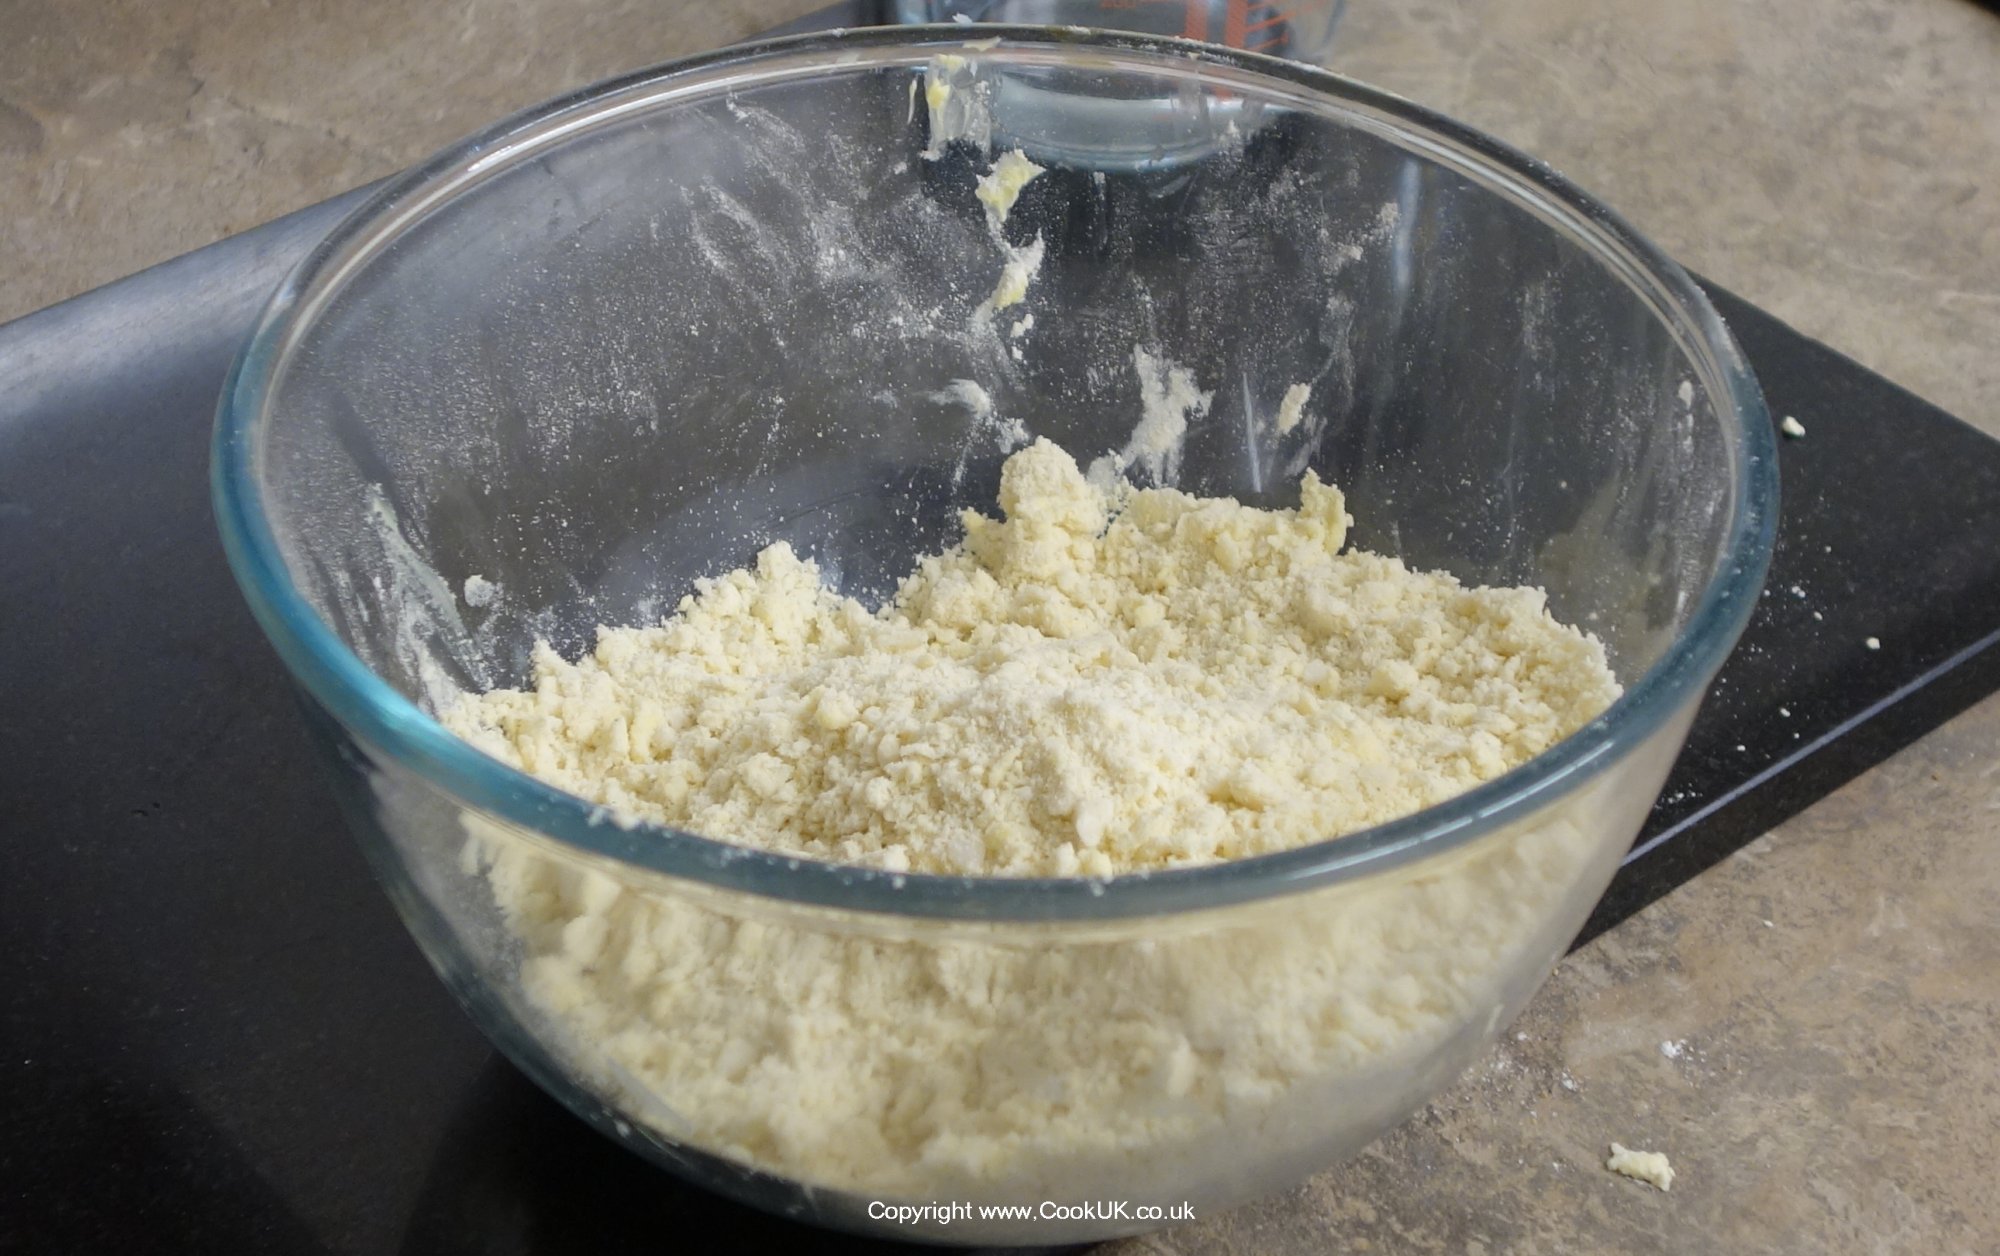
Mix it all together with your hands until you have a crumbly texture. Click the picture to enlarge it - all the pictures can be enlarged.This stage should only take a minute or so but it's one of the joys of making apple pie.
 
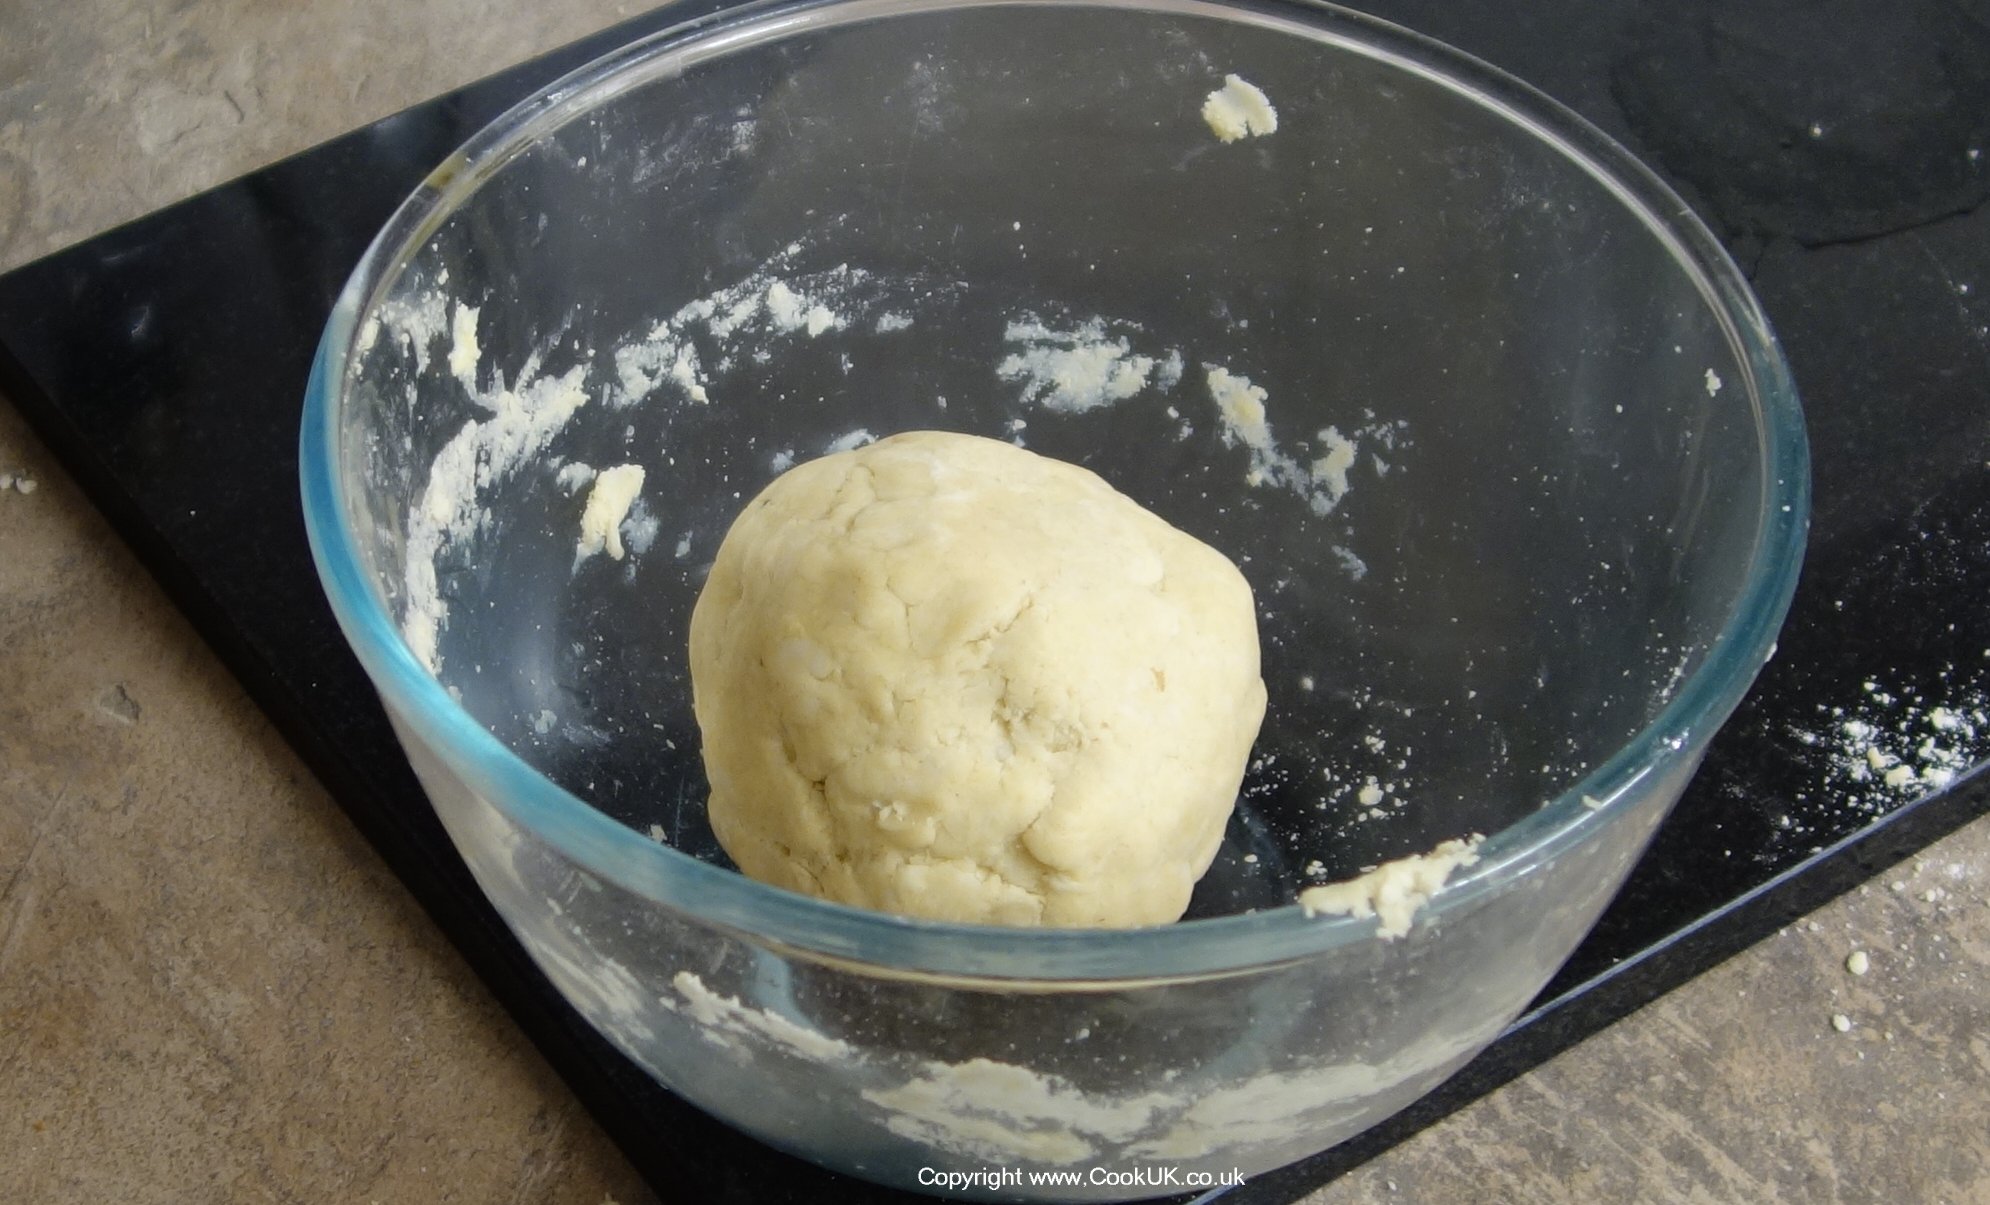
The mixed pastry ready to go in the refrigerator, click to enlarge Add 3 tablespoons of water to the pastry and mix it in with a knife. Then use your hands to mould the pastry mix into a ball (see picture). You can tell the mix is correct because the pastry ball will collect all the bits of pastry from the edge of the bowl leaving it almost clean! Wrap the pastry ball in cling film and put it in the fridge to 'rest' for half an hour.
 
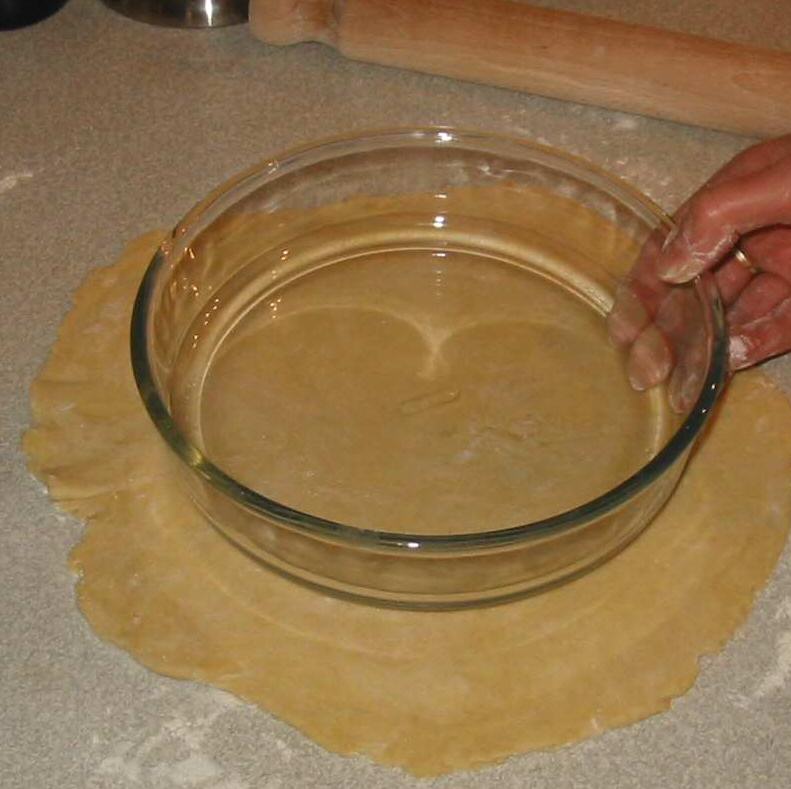
After half an hour, take the pastry from the fridge, and separate roughly two thirds of it. Roll the pastry out with a rolling pin so that it is large enough to line the base and sides of the pie dish. Use several sprinklings of flour on the rolling pin and the surface used for rolling the pastry. Put the dish over the rolled pastry to make sure it is about the correct size (see picture).
 
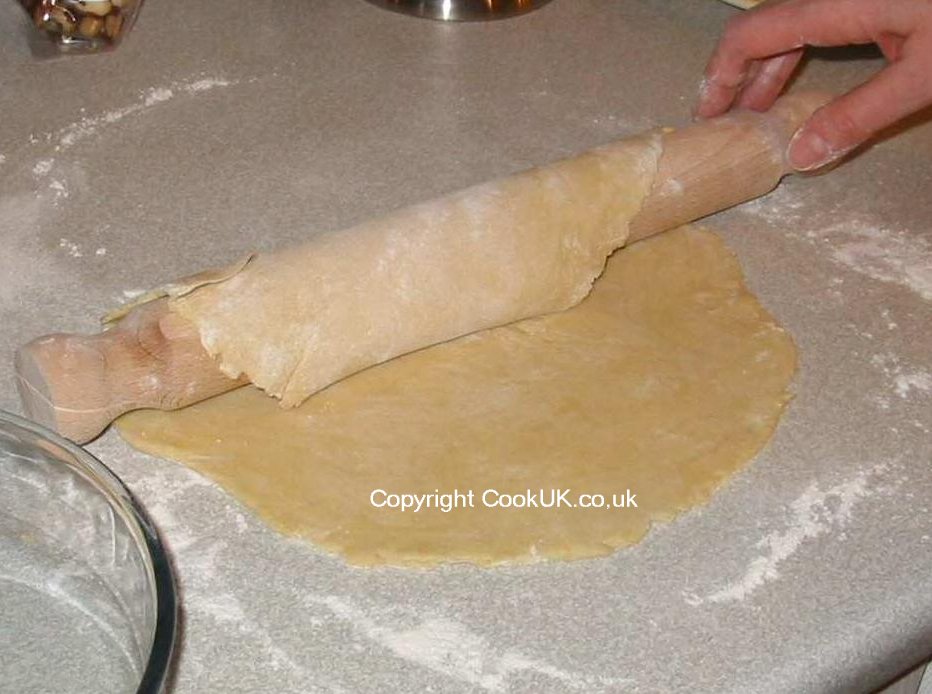
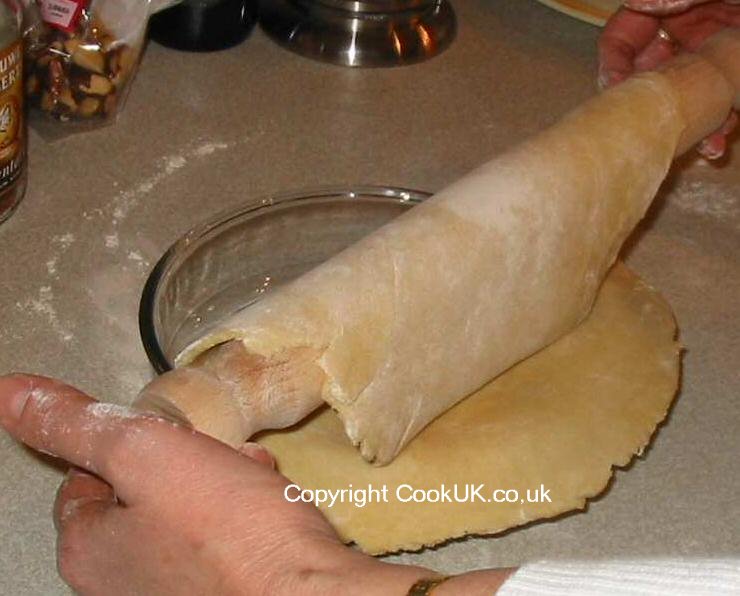
Now for a slightly complicated bit, but we will hold your hand and guide you through it! See the two pictures on the right for a visual explanation. Both pictures can be enlarged by clicking on them. The idea is to pick up the rolled out pastry and put it in the dish to form the base of the apple pie.
First, lightly roll 50% or so of the flattened pastry over the rolling pin. Then support the rest with your hand and transfer it to top of the  dish.
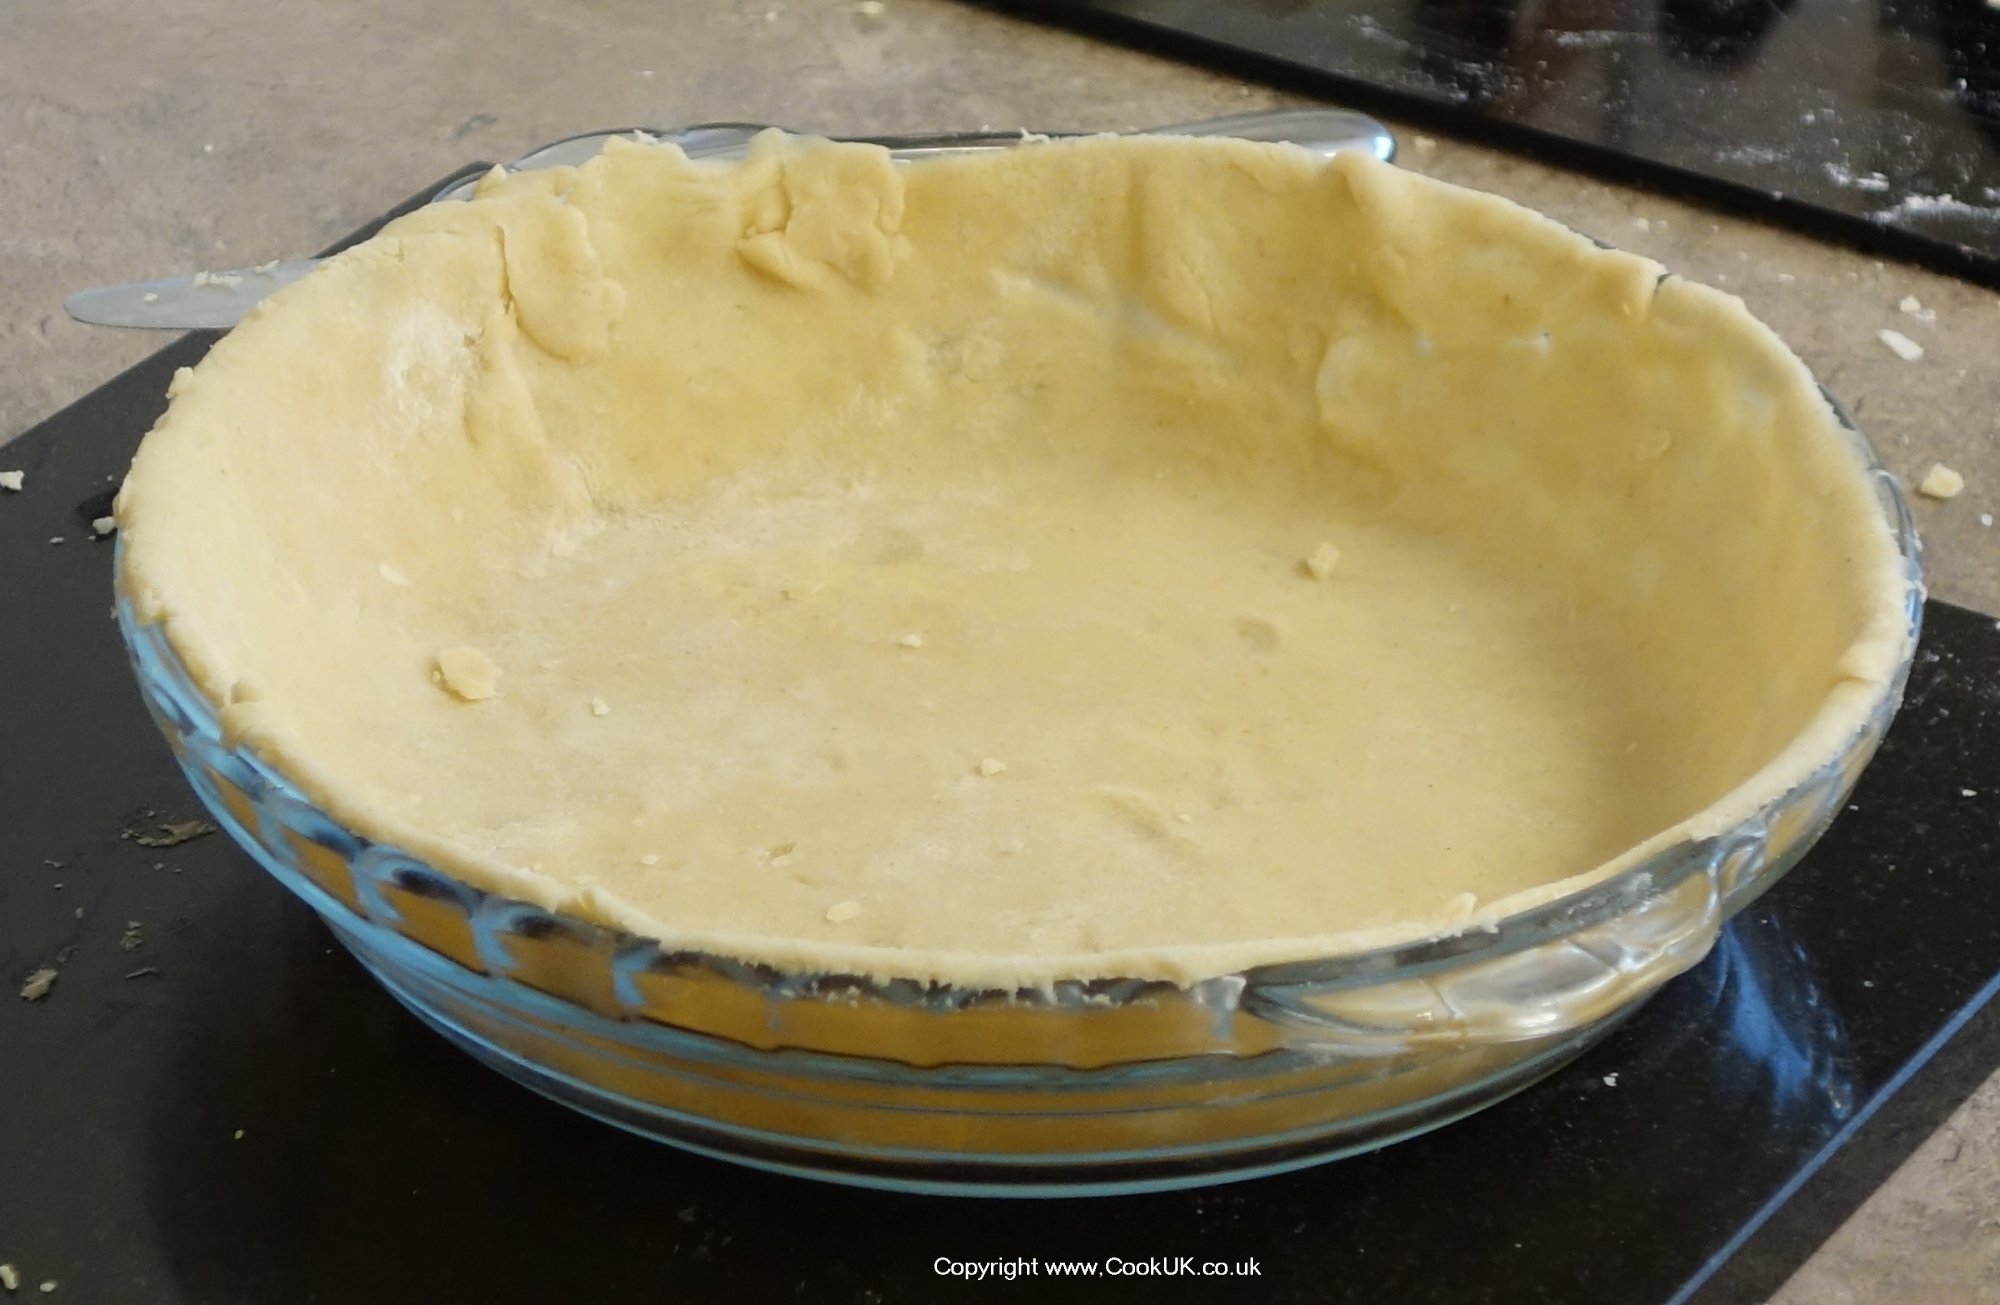
Gently ease into the base of the  dish and firm it round the sides.

The pastry in the base of the dish If the pastry does break at all, it's not a disaster, just do your best to cover the base and sides. Then trim off the excess pastry from the top. Do this with the 'blunt' side of a knife - the blunt side is far less likely to tear the pastry.
Turn your oven on now so that it's pre-heated ready to cook later on. Heat settings are 220°C / 425°F / Gas Mark 7.
 
Now is the time to peel the cooking apples, cut them into quarters and then slice them. See the picture on the right for how fine to slice the apples. Each quarter should produce roughly 8 to 10 slices. Accuracy is not so important. The thicker the slices, the more firm the apple mixture will be when it has been cooked.
 
Place the apple slices into the pie bowl on top of the base pastry. Do this in three layers, scattering a third of the sugar on each layer.
Using water and a pastry brush (or your wet fingers) dampen the top edge of the pastry. This will help the top pastry to attach firmly to it better.


Ready for the oven
Take the remaining third of the pastry and roll it out with the rolling pin into a circle that is a little bit bigger than the top of the dish. Transfer the rolled out pastry to the top of the pie using the rolling pin in the same way described for the base pastry.
Tuck the pastry down at the edge and remove the excess pastry using the blunt edge of a knife (see left picture which can be enlarged by clicking on it).
Using both hands, 'crimp' the pastry round the edge of the pie to obtain an attractive finish - enlarge photos 2 and 3 to see more clearly how we did it.
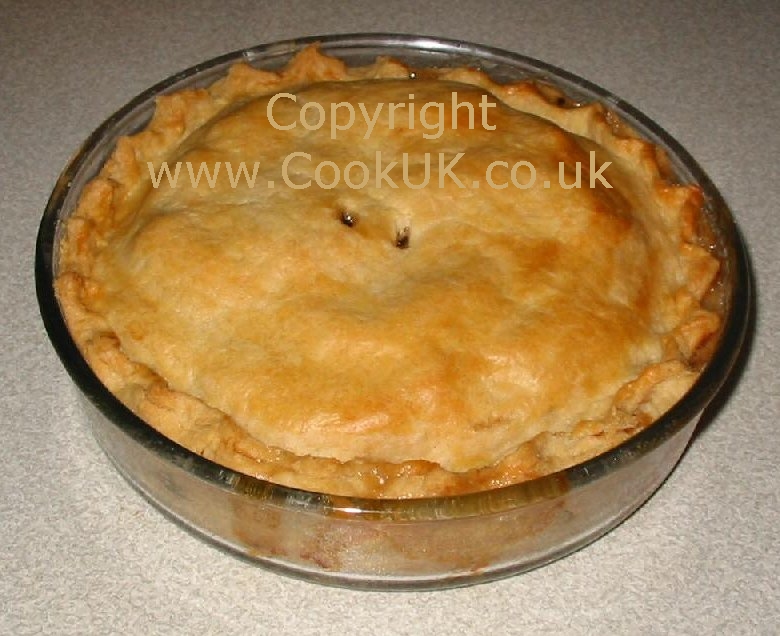
Finally make 2 holes in the top of the pastry to allow the steam to come out during cooking and prevent the top going soggy.
Lightly brush the top with a little milk to give it a light brown colour when cooked.
 
Put the apple pie in the pre-heated oven (220°C / 425°F / Gas Mark 7) and leave it cooking at that temperature for 10 minutes. Then turn down the heat to 190°C / 375°F / Gas Mark 5 and cook for a further 40 minutes. When it is cooked, leave to cool for at least 15 minutes before serving.
Beware, apple pie can stay really hot for an hour or so.
Serve hot or cold with ice cream, cream or custard.
In the unlikely event that there is any left over, cover the dish with tin foil and it will keep fine in the fridge for a couple of days.

http://www.cookuk.co.uk/apple_pie_recipes/apple-pie-recipe.htm

30 gennaio 2013

MASA BRISÉE (RECETAS BÁSICAS)

Esta masa es ideal para hacer tartas rellenas dulces.
Suave y delicada.
Se adaptada a infinita variedad de rellenos.

INGREDIENTES

• 90 gr de mantequilla
• 65 gr de azúcar
• 150 gr de harina común
• 15 gr de sal
• 1 yema de huevo grande
• Aroma de limón y vainilla, 1 cdita de cada una


PREPARACIÓN:

1) Batimos la mantequilla A TEMPERATURA AMBIENTE, con el azúcar, hasta formar una crema homogénea.
2) Le añadimos la yema y seguimos batiendo
3) Perfumamos con los aromas
4) Le agregamos la harina, tamizada con la sal, y formamos un bollo sin amasar.
5) Descansamos en la nevera por espacio de media hora.

Opciones de rellenos fáciles y rápidos:
1) Estiramos la masa sobre una mesa enharinada ayudàndonos con un rodillo, acomodamos en una tartera y cocinamos  en el horno, a temperatura moderada (180 grados) hasta dorar.
Dejamos enfriar y untamos con una capa de mermelada de fresas, arriba nata montada o crema pastelera y una capa de fresas fileteadas.

2)Estiramos la masa sobre la mesa enharinada ayudándonos con un rodillo, acomodamos en una tartera y cocinamos en el horno a temperatura moderada (180 grados) hasta dorar.
 Dejamos enfriar y untamos con una capa de mermelada de albaricoque, arriba crema pastelera y frutas de estación fileteadas (uvas, kiwis, gajos de mandarinas, fresas, etc). Pintamos con mermelada de albaricoque.

Otra opción es realizar un delicioso Lemon Pie (o pastel de limón)

 que AQUÍ encontrarán la receta.
 

Tarta de chocolate y frambuesas

Rica no, riquísima y muy fácil es esta tarta de chocolate y mermelada de frambuesas, irresistible combinación. Chocoadict@s al ataque !!!!!!

Esta es mi aportación al Recetario mañoso que este mes va dedicado al chocolate.

Tarta de chocolate y frambuesas
Ingredientes para un molde de 18-20 cm.:
Para la base:
1 lámina de masa sablée (quebrada) pincha aquí para ver como la hago
1 cucharada de cacao en polvo tamizado
Para el relleno:
250 g. de chocolate
200 ml. de nata 35%MG
2 cucharadas de azúcar morena (a gusto)
Mermelada de frambuesas (puede ser cualquier fruta)
Avellanas caramelizadas (mira aquí)
Preparación:
Para la base, si utilizamos la masa comprada espolvorear por encima el cacao en polvo y amasar hasta tener bien incorporado, estirar entre dos papeles parafinados y dejar reposar en la nevera 1 h.
Si hacemos nosotros la masa, añadir el cacao a los ingredientes de la receta añadiéndolo junto con la harina.
Pasado el tiempo de reposo, precalentar el horno a 175º.
Cubrir el molde con la masa, presionar para  que no queden burbujas y retirar la masa sobrante.
Hornear en blanco durante 15 min., (cubrir la base con papel parafinado y colocar encima garbanzos o judías secas) retirar el peso y hornear 10 min. más hasta que se vea la masa dorada. Dejar enfriar sobre una rejilla.
Para el relleno, calentar la nata, añadir el chocolate troceado, el azúcar y remover hasta que esté bien mezclado.
Cubrir la base con una capa de mermelada y verter encima el chocolate. Dar unos golpecitos para alisar y dejar cuajar, se puede dejar dentro o fuera de la nevera, pero si la ponemos en la nevera, sacar 1 h. antes de servir, para que tenga la temperatura ambiente.
Antes de servir decorar con las avellanas caramelizadas (se pueden sustituir las avellanas por nueces del país, pecanas o macadamias)
Dificultad: Fácil
Tiempo total de preparación:  30 min., más los tiempos de reposo
 
Tarta de chocolate y frambuesas

22 gennaio 2013

Chocolate Fudge Pie

 Chocolate Fudge Pie
 
Serves 8| Hands-On Time: 20m| Total Time: 4hr 00m

Ingredients

Directions

  1. Heat oven to 375º F. Place the pie plate on a baking sheet. Prick crust with a fork and line with foil. Fill to top with pie weights or dried beans. Bake until the edges are firm, 20 to 25 minutes. Remove the foil and weights and bake until just golden, 8 to 10 minutes.
  2. Reduce oven temperature to 325º F. In a heatproof bowl set over (not in) a saucepan of simmering water, melt the chocolate and butter.
  3. Using an electric mixer, beat the eggs, salt, and ½ cup of the sugar until fluffy, 4 to 5 minutes. Fold a third of the egg mixture into the chocolate mixture, then fold in the remainder.
  4. Pour the combined mixture into the crust and bake until puffed and beginning to crack, 20 to 25 minutes. Cool for 1 hour, then chill.
  5. Beat the cream with the remaining sugar until soft peaks form. Spread over the pie and sprinkle with the shaved chocolate.

Quick Tip

Pie crust
 
The pie can be prepared without the toppings and refrigerated, loosely covered with plastic wrap, for up to 2 days. Top it with the whipped cream and shaved chocolate and refrigerate uncov- ered for up to 6 hours. Bring to room temperature before serving.
 

Nutritional Information

  • Per Serving
  • Calories 599
  • Fat 43g
  • Sat Fat 26g
  • Cholesterol 180mg
  • Sodium 191mg
  • Protein 7g
  • Carbohydrate 51mg
  • Fiber 1g
 http://www.realsimple.com/food-recipes/browse-all-recipes/chocolate-fudge-pie-recipe-00000000022645/index.html

Basic Flaky Piecrust

 Basic Flaky Piecrust
 
Makes one 9-inch piecrust| Hands-On Time: 10m| Total Time: 1hr 40m

Ingredients

  • 1 1/4  cups  all-purpose flour, spooned and leveled, plus more for rolling the dough
  • 1/2  cup  cold unsalted butter (1 stick), cut into small pieces
  • 1  tablespoon  sugar
  • 1/2  teaspoon  kosher salt
  • 3 to 4  tablespoons  ice water

Directions

  1. In a food processor, pulse the flour, butter, sugar, and salt until the mixture resembles coarse meal with a few pea-size clumps of butter remaining.
  2. Add 2 tablespoons of the water. Pulse until the mixture holds together when squeezed but is still crumbly (add more water, a little at a time, as necessary). Avoid overprocessing, which will make the dough tough.
  3. Place the still crumbly mixture on a sheet of plastic wrap. Shape it into a 1-inch-thick disk, using the plastic wrap to help. Wrap tightly and refrigerate until firm, at least 1 hour and up to 3 days. (The dough can be frozen at this point for up to 2 months.)
  4. Place the disk of dough on a floured piece of parchment or wax paper. Using your knuckles, make indentations around the perimeter of the dough (this will help prevent cracking when you roll the dough out).
  5. With a floured rolling pin, roll the dough into a 12-inch circle (work from the center outward, and use the parchment to rotate the dough). Flour the rolling pin, parchment, and dough as necessary to prevent sticking.
  6. Loosen the dough from the parchment and carefully transfer to a 9-inch pie plate. Fit the dough into the plate (avoid stretching). Trim the dough to a 1-inch over-hang and tuck it under itself to create a thick rim.
  7. With the index finger of one hand, press the dough against the thumb and fore-finger of the opposite hand; continue around the perimeter of the crust. Refrigerate for at least 30 minutes and up to 2 days before using.
  8. See step-by-step photos of how to make piecrust.
  9. How to parbake and prebake a piecrust: Line the chilled crust with a piece of foil, leaving an overhang all around. Fill with dried beans or pie weights and bake at 350° F for 30 minutes. Remove the beans and foil. For a parbaked (partially baked) crust, bake until dry and set, 5 to 8 minutes more. For a prebaked crust, bake until golden, 10 to 12 minutes more. Let the crust cool completely before filling.

Quick Tip

Gingery Apple Crumb Pie
 
When baking a fruit pie, put a foil-lined baking sheet on the bottom of the oven to catch bubbling juices.


Nutritional Information

  • Per Serving
  • Calories 178
  • Fat 12g
  • Sat Fat 7g
  • Cholesterol 30mg
  • Sodium 122mg
  • Protein 2g
  • Carbohydrate 16g
  • Sugar 2g
  • Fiber 1g
  • Iron 1mg
  • Calcium 6mg

 http://www.realsimple.com/food-recipes/browse-all-recipes/basic-flaky-piecrust-recipe-00000000022710/index.html


How To: Make Your Own Piecrust

Bourbon and Orange Pecan Pie

Easy enough for first-timers, this surprisingly simple tutorial will make even the most reluctant bakers into believers. This recipe makes one 9-inch piecrust with just 10 minutes of hands-on time (total time: 1 hour, 40 minutes). 

What You Need
1¼ cups all-purpose flour, spooned and leveled, plus more for rolling the dough; ½ cup (1 stick) cold unsalted butter, cut into small pieces; 1 tablespoon sugar; ½ teaspoon kosher salt; 3 to 4 tablespoons ice water

Follow These Seven Easy Steps

How To: Make Piecrust Step 1

1- Cut the butter into the dry ingredients
In a food processor, pulse the flour, butter, sugar, and salt until the mixture resembles coarse meal with a few pea-size clumps of butter remaining.
How To: Make Piecrust Step 2

2- Add water
Add 2 tablespoons of the water. Pulse until the mixture holds together when squeezed but is still crumbly (add more water, a little at a time, as necessary). Avoid overprocessing, which will make the dough tough. 

How To: Make Piecrust Step 3

3- Chill the dough
Place the still crumbly mixture on a sheet of plastic wrap. Shape it into a 1-inch-thick disk, using the plastic wrap to help. Wrap tightly and refrigerate until firm, at least 1 hour and up to 3 days. (The dough can be frozen at this point for up to 2 months.) 

How To: Make Piecrust Step 4

4-Soften the edges of the dough
Place the disk of dough on a floured piece of parchment or wax paper. Using your knuckles, make indentations around the perimeter of the dough (this will help prevent cracking when you roll the dough out). 

How To: Make Piecrust Step 5

5-Roll out the dough
With a floured rolling pin, roll the dough into an 12-inch circle (work from the center outward, and use the parchment to rotate the dough). Flour the rolling pin, parchment, and dough as necessary to prevent sticking. 

How To: Make Piecrust Step 2

6-Fit the dough into a pie plate
Loosen the dough from the parchment and carefully transfer to a 9-inch pie plate. Fit the dough into the plate (avoid stretching). Trim the dough to a 1-inch overhang and tuck it under itself to create a thick rim. 

How To: Make Piecrust Step 7

7-Crimp the rim
With the index finger of one hand, press the dough against the thumb and forefinger of the opposite hand; continue around the perimeter of the crust. Refrigerate for at least 30 minutes and up to 2 days before using.

 http://www.realsimple.com/food-recipes/cooking-tips-techniques/baking/how-to-make-your-own-piecrust-00000000022711/index.html


Chocolate

The Aztec king Montezuma believed chocolate to be an aphrodisiac (perhaps explaining its popularity on Valentine’s Day). With its antioxidants, a bit of dark chocolate may even be literally good for your heart.
  • How to Choose Chocolate

    Chocolate should be evenly colored and slightly shiny. A light powdery coating means the chocolate is old or has not been stored properly. Good chocolate should break cleanly, not crumble or splinter. White chocolate is not true chocolate; it contains cocoa butter but none of the chocolate liquor the other chocolates have. The percentage on chocolate's packaging tells you how much of it was derived from the cacao bean (in the form of chocolate liquor, cocoa butter, and cocoa powder). Generally, the higher the percentage, the more intense the chocolate flavor.

    How to Store Chocolate

    All chocolate should be stored wrapped in a cool, dry place. Dark chocolate can last up to 10 years, but milk chocolate and white chocolate (because they contain milk solids) keep no longer than 9 months.

    How to Prepare Chocolate

    To melt a block of chocolate, chop it with a chef's knife, place in a heatproof bowl, and set the bowl over a pot with about an inch of simmering water. Stir the chocolate occasionally; remove the bowl from the pan when just a few small chunks remain (the residual heat will melt it). 

    http://www.realsimple.com/food-recipes/ingredients-guide/chocolate-00000000039294/index.html


French Silk Pie

choc pie creamed spinach pizza crust 058

I’m putting in a little bonus at the end that you can be use to adorn any number of chocolate desserts, including my own Chocolate Sheet Cake, which is 100% safe for everyone! So skip forward to that point while the rest of us raw egg freakos make the pie.

Chocolate Pie and Misc 105

The Cast of Characters: One baked pie shell (I used Perfect Pie Crust), Butter, Sugar, Vanilla, Eggs, and Unsweetened Baking Chocolate (I used Hershey’s, but anything is fine. If you’re interested in my baking chocolate taste test, visit this post on Serious Eats.)

Chocolate Pie and Misc 107

My girls helped me make this pie crust, I put a piece of aluminum foil in the bottom and filled it with dried pinto beans to keep it fron shrinking while it baked. I also wrapped foil around the edge (my girls did that, too, the little boogers) to keep it from burning.

Chocolate Pie and Misc 110

Break up four ounces of chocolate…

Chocolate Pie and Misc 112

And place it in a microwave-safe bowl. Nuke it for about 45 seconds, or until stirrable. Set aside and cool.

Chocolate Pie and Misc 114

Now throw two sticks of softened butter (regular, salted) into the bowl of your mixer. A mixer is essential here.

Chocolate Pie and Misc 117

Dump in 1 1/2 cups sugar.

Chocolate Pie and Misc 118

Mix until fluffy, about 1 to 1 1/2 minutes.

Chocolate Pie and Misc 119

Make sure your chocolate is cooled…

Chocolate Pie and Misc 127

And drizzle it into the bowl.

Chocolate Pie and Misc 131

Now find your vanilla. Then, as I just did, wipe the fingerprints and batter smudges from the bottle so your readers won’t think you’re a total slob.

Chocolate Pie and Misc 132

Then, add 1 teaspoon to the bowl.
I think vanilla extract should be sainted. From pancakes to icing to pie, its contribution can not be underestimated.

Chocolate Pie and Misc 057

Mix it together thoroughly, and now it’s time to get serious, people. I need you to straighten in your chairs and listen. Read. Whatever.

Chocolate Pie and Misc 060

You’re going to turn the mixer on medium speed (on a Kitchen Aid, I use 7), and over a period of 15 to 20 minutes, you’re going to add in four eggs. After you add each egg, allow the mixture to beat for four to five minutes. And don’t rush it. Just let it happen, people.

Chocolate Pie and Misc 061

Here, I’ve added the first egg. This is four minutes later.

Chocolate Pie and Misc 062

Here, I’ve added the second egg. This is five minutes after that addition.

Chocolate Pie and Misc 064

Now, during the twenty-odd minutes of mixing in the four eggs, the mixture’s consistency will change constantly. Don’t read into it, and don’t suddenly become plagued with a raging case of self doubt. If you give each egg at least four to five minutes, it’ll turn out right.

Chocolate Pie and Misc 065

For the love of Our Lady of Perpetual Bliss, will you take a dadgum look that THAT? THAT is what you call chocolate pie filling.

Chocolate Pie and Misc 071

Oh! That reminds me! We now must FILL our PIE.

Chocolate Pie and Misc 075

Oh, lawsie mercy. Lawsie. Mercy.

Chocolate Pie and Misc 077

Hello, my beautiful lover. Why have you stayed away from me for so long?

Chocolate Pie and Misc 079

Now, just smooth out the surface every so slightly…

Chocolate Pie and Misc 081

And because you don’t like to waste perfectly good chocolate pie filling…

Chocolate Pie and Misc 082

You need to go ahead and lick it, baby.
Okay! Now you need to cover and refrigerate the pie for at least two hours. More is better. And before we cut into it an eat it, which you’re certainly free to do at any time after the two hours, let’s try something fun.
*Non raw-eggers can come in now.

choc pie creamed spinach pizza crust 065

Have you ever made chocolate curls? NO?????????? Oh, okay. That’s cool.
But let’s make them right now. They’re fun, they’re easy, they’re fanciful…yada yada yada, who am I kidding? They make you look reeeeeal coooool, is what they do.

choc pie creamed spinach pizza crust 019

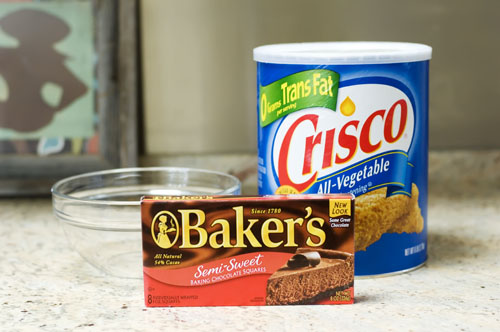
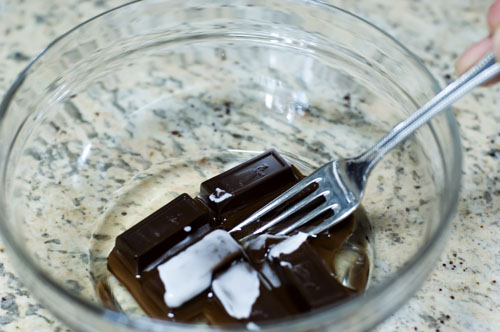
Grab some Crisco and some semi-sweet baking chocolate. (Any brand will do, and you can even use semi-sweet chocolate chips if you’d like!)

choc pie creamed spinach pizza crust 020

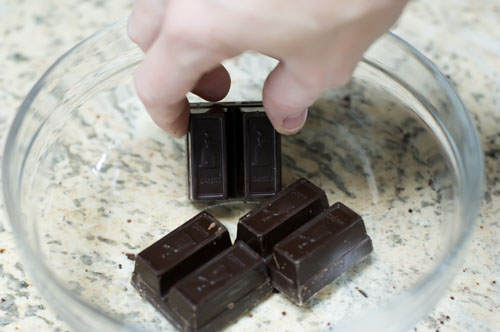
Place three ounces (usually three squares) of chocolate into a microwave-safe bowl.

choc pie creamed spinach pizza crust 021

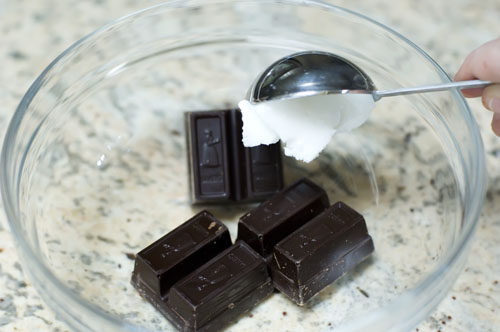
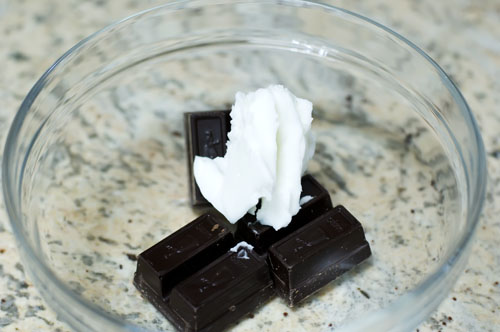
Now place one tablespoon of Crisco (vegetable shortening) into the bowl.

choc pie creamed spinach pizza crust 022

Now throw it in the microwave for 30 to 45 seconds, or until the shortening is melted and hot.

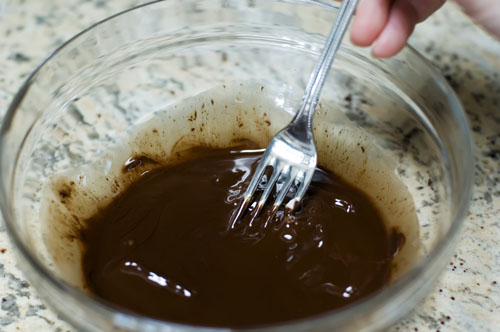
choc pie creamed spinach pizza crust 023

With a fork…

choc pie creamed spinach pizza crust 024

Stir to combine thoroughly.

choc pie creamed spinach pizza crust 024

And there you have it—chocolate curls!
Just kidding. I just love doing that, though.

choc pie creamed spinach pizza crust 030

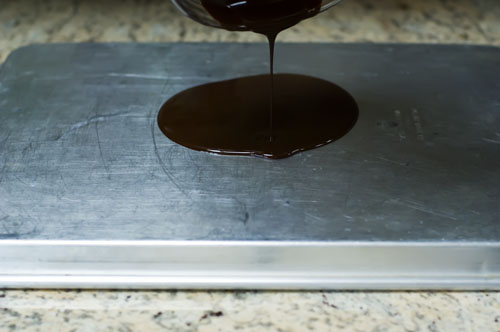
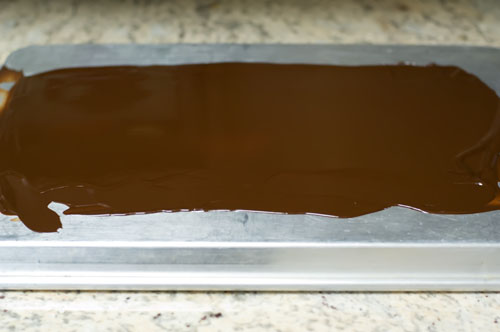
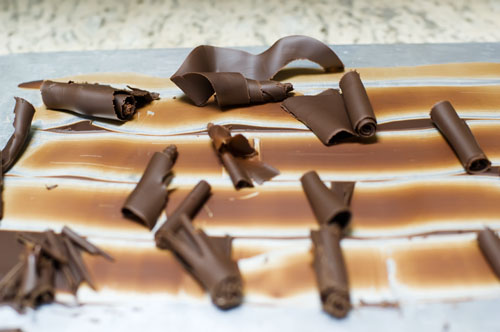
Now, grab a metal cookie sheet, turn it upside down, and pour the melted chocolate on.

choc pie creamed spinach pizza crust 031

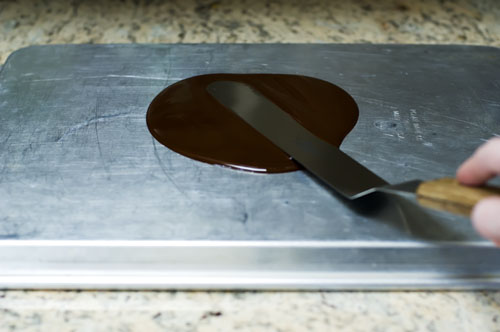
Then, with a flat spatula (or heck, a knife), spread the chocolate in a thin layer…

choc pie creamed spinach pizza crust 034

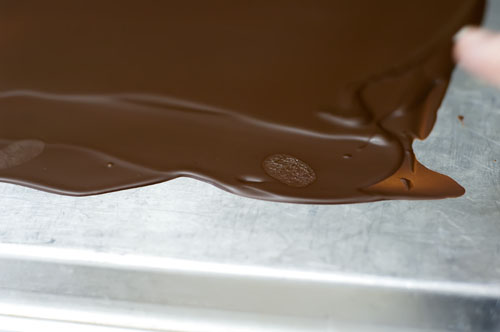
Keep going until it’s very, very thin. Then…and this is the key…stick it in the freezer for a few minutes.

choc pie creamed spinach pizza crust 035

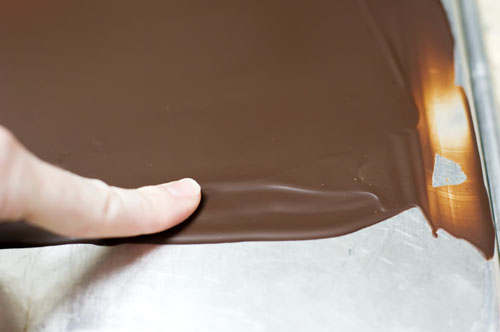
Now, this is after one minute in the freezer. I gave the chocolate the ol’ fingerprint test, and it failed miserably. It’s still way too soft to make the curls. So I put it back in for exactly two minutes.

choc pie creamed spinach pizza crust 036

Be sure to give it the ol’ fingerprint test. And when it’s ready, it should leave the slightest mark, but not an actual depression.
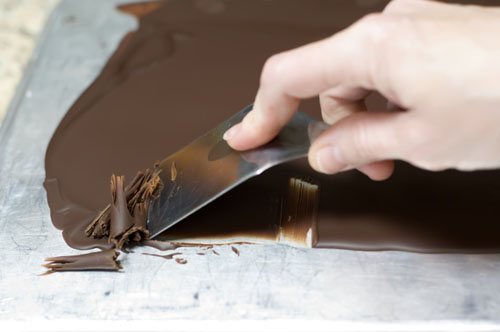
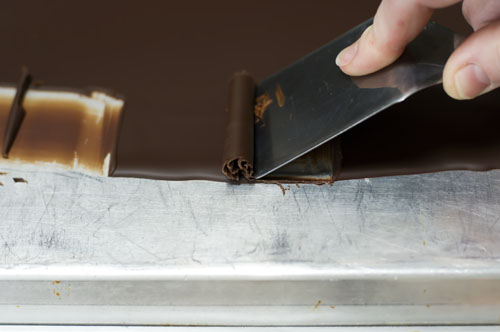
Next, get a somewhat sharp-edged spatula and begin to scrape the chocolate from the bottom of the pan. When the chocolate is just the right temperature, it’ll curl instead of break.

choc pie creamed spinach pizza crust 038

See, right now it’s still just a tad too cold/hard. So I waited one minute and tried again.

choc pie creamed spinach pizza crust 041

And guess what? It’s just right.

choc pie creamed spinach pizza crust 042

Now you have a couple of minutes before the chocolate gets too soft.

choc pie creamed spinach pizza crust 044

So just scrape along the bottom of the pan…

choc pie creamed spinach pizza crust 047

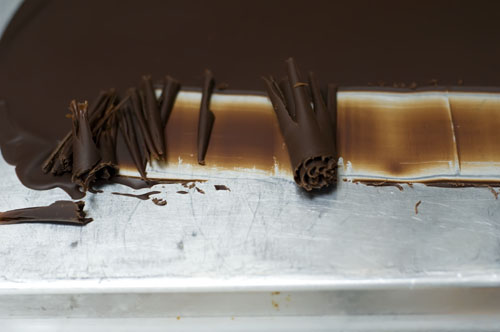
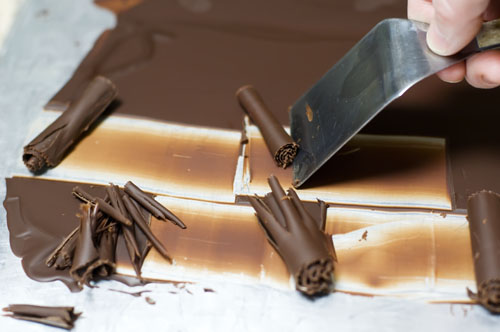
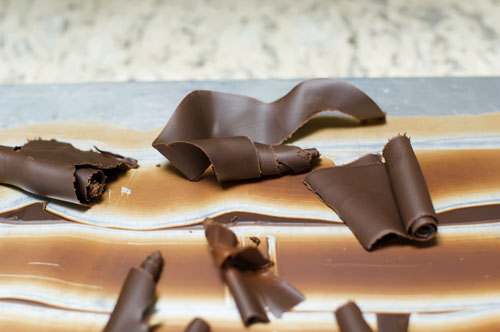
…And the chocolate will curl right up. If it’s too hard, give it a minute, then try again. If it gets too soft, stick it back in the freezer for a minute.

choc pie creamed spinach pizza crust 048

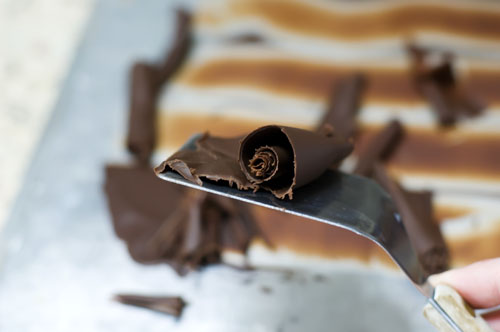
Pretty soon you’ll have a bunch of fun little chocolate curls.

choc pie creamed spinach pizza crust 049

And I have no idea how this one happened, but I think it’s kinda neat. And I totally meant to do it.
Important: as soon as possible, transfer the curls to a cold pan or plate, then stick them in the freezer to harden. Store in the freezer in a Ziploc bag until you need them.
Now it’s time to retrive the chocolate pie that’s been chilling in the fridge.

choc pie creamed spinach pizza crust 052

Now WAIT a minute! This isn’t what it looked like earlier. I have no idea how this happened, either.

choc pie creamed spinach pizza crust 055

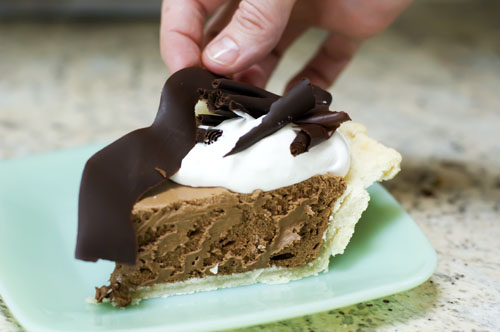
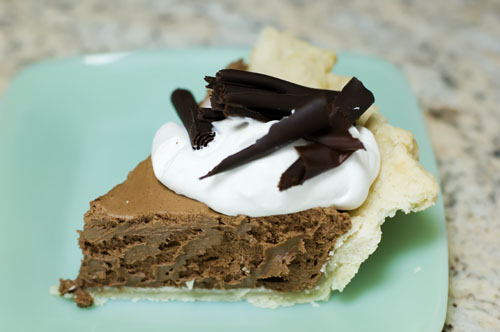
Cut yourself a piece of pie and plop some whipped cream on top.

choc pie creamed spinach pizza crust 058

Now start decorating it with chocolate curls.

choc pie creamed spinach pizza crust 059

I thought the big one was a little distracting, so I went ahead and ate it.
Hey, it’s for the art.

choc pie creamed spinach pizza crust 061

Now, the chocolate curls are fun and all, but let’s not forget what lies at the heart of this chocolate pie. It’s the chocolate pie itself.

choc pie creamed spinach pizza crust 061

And baby, let me tell you. This is one chocolate experience you’re not likely to forget.


Prep Time:
Cook Time:
Difficulty: Easy
Servings: 8

Ingredients

  • 4 ounces, weight Unsweetened Baking Chocolate
  • 1 cup Salted Butter, Softened
  • 1-1/2 cup Sugar
  • 1 teaspoon Vanilla Extract
  • 4 whole Eggs
  • 1 package Baked Pie Shell

Preparation Instructions

In small microwave safe bowl melt 4 ounces of unsweetened baking chocolate until stirrable (about 45 seconds on high). Set aside to cool.
In a large bowl with an electric mixer beat 1 cup (2 sticks) of regular (salted) butter and 1 ½ cups of white sugar until fluffy (about 1 to 2 minutes). When melted chocolate is cooled, drizzle it over the butter/sugar mixture. Add 1 teaspoon of vanilla extract. Beat the mixture thoroughly until combined (on a Kitchen Aid mixer, you will be using the whisk attachment).
Turn your mixer to a medium speed and over a period of 15 to 20 minutes add in the four eggs, one at a time, leaving about 5 minutes between each egg addition. Once the pie filling is well mixed, pour it into the baked pie shell, scraping every last speck of it out of the bowl. Smooth out the pie filling and place pie in the refrigerator to chill for at least two hours (preferably longer).
Plop a heap of whipped cream and garnish with a few chocolate curls if you’re feeling sassy.

http://thepioneerwoman.com/cooking/2008/02/the_meal_of_love_part_iv_de-licious_chocolate_pie/