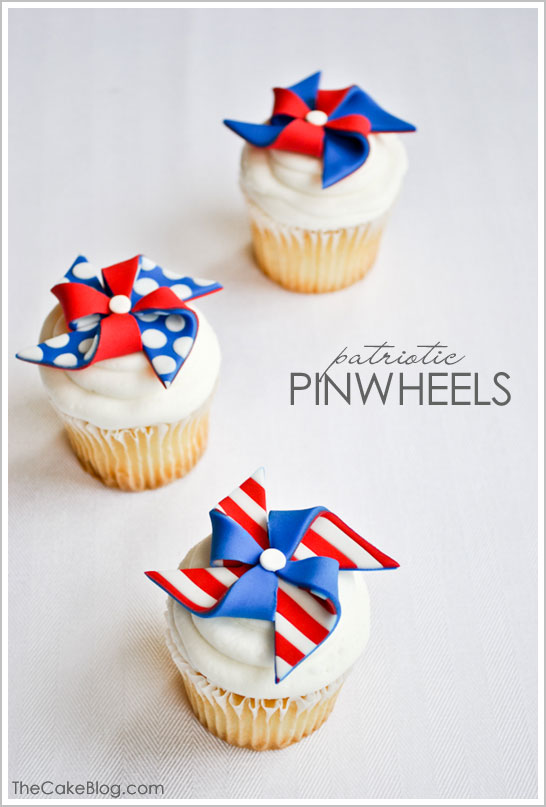
To simplify this tutorial, I’m using pre-colored, store-bought fondant, available at most craft stores. A small multi-color pack, like this one, contains both the red and the blue we’ll need. (Plus some yellow and green you can save for a later project.) Obviously, you can color your own fondant or easily change the entire color scheme of these pinwheels. They would also be perfect for birthday cupcakes!
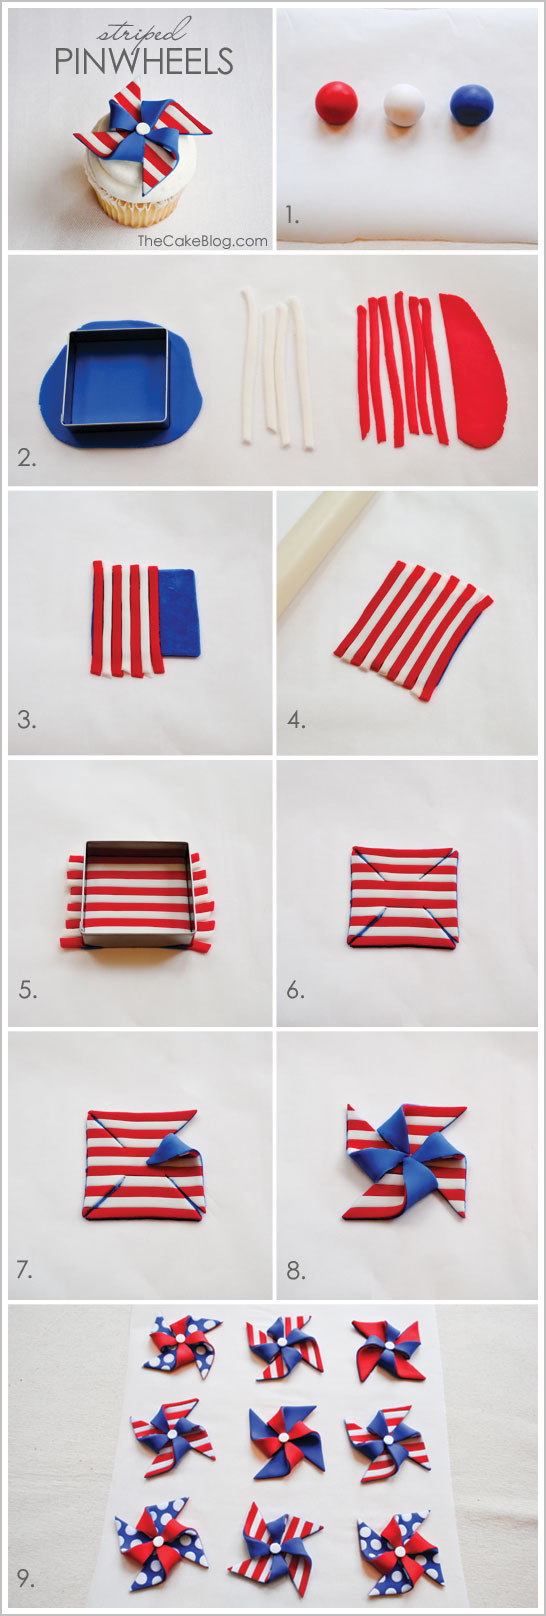
STRIPED PINWHEEL CUPCAKES
a DIY by Carrie Sellman
Supplies:
Your Favorite Cupcakes
Fondant in red, white and blue
Rolling pin
Parchment paper
Square cookie cutter or ruler
Sharp knife
Step by Step Instructions
STEP 1: Kneed fondant in hands until soft and smooth.
STEP 2: Take a small amount of blue and roll it out onto parchment paper using a rolling pin. Roll it out thin. About 1/4 of an inch or thinner. Cut a square using a square cookie cutter or a ruler and sharp knife. Roll out small amounts of both red and white. Cut strips of both red and white, about 1/4 inch wide and slightly longer than your square.
STEP 3: Lightly brush a few drops of water onto the blue square. (Go easy with the water, you only need to lightly dampen the fondant.) Place red and white strips on top of blue square. Line them up side by side, as straight as you can. Cover the entire blue square.
STEP 4: Gently roll again with your rolling pin to flatten your stripes and seal these two layers. Don’t worry that it is no longer a perfect square.
STEP 5: Use your cookie cutter to trim the excess edges, leaving behind a straight square. (Discard your trimmings or save for a purple project later). You now have one square that is blue on bottom, striped on top.
STEP 6: Using your knife, make diagonal slits cutting from each corner towards the center. Lightly moisten the very center with a dab of water.
STEP 7: Gently pick up one corner and bend it in so that the point reaches the center. Press down gently so the point sticks to the center.
STEP 8: Repeat Step 7, folding in every other corner until you have a pinwheel shape.
STEP 9: Roll or cut a tiny ball of white fondant for the center. Attach to center with a light drop of water, if needed. Push down gently to seal. Let pinwheels dry on parchment paper overnight or until completely dry and firm. Place on top of cupcakes when ready to serve.
Okay, now that you’ve seen how to do the stripes, the polka dots should be a piece of cake! Here we go…
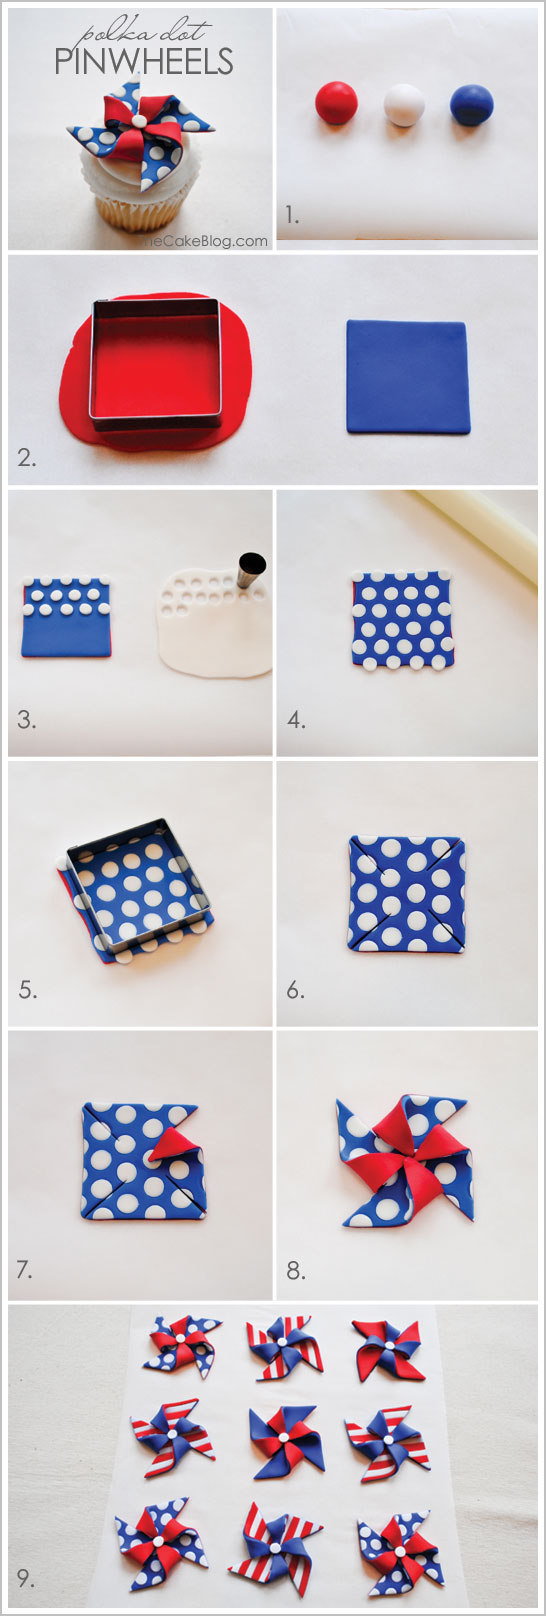
POLKA DOT PINWHEEL CUPCAKES
a DIY by Carrie Sellman
Supplies:
Your Favorite Cupcakes
Fondant in red, white and blue
Rolling pin
Parchment paper
Square cookie cutter or ruler
Small circle cutter or #12 tip
Sharp knife
Step by Step Instructions
STEP 1: Kneed fondant in hands until soft and smooth.
STEP 2: Take a small amount of red and roll it out onto parchment paper using a rolling pin. Roll it out thin. About 1/4 of an inch or thinner. Cut a square using a square cookie cutter or a ruler and sharp knife. Roll out and cut a blue square, just as you did for the red. You now have two squares.
STEP 3: Lightly brush a few drops of water onto the red square. (Go easy with the water, you only need to lightly dampen the fondant.) Place blue square on top of red square. Roll out a small amount of white and cut out dots. I used the small end of a #12 piping tip. Attach dots to blue square with a small dab of water, if needed. Cover the entire square with dots, staggering the rows.
STEP 4: Gently roll again with your rolling pin to flatten your dots and seal these two layers. Don’t worry that it is no longer a perfect square.
STEP 5: Use your cookie cutter to trim the excess edges, leaving behind a straight square. (Discard your trimmings or save for a purple project later). You now have one square that is red on bottom, blue and white polka dots on top.
STEP 6: Using your knife, make diagonal slits cutting from each corner towards the center. Lightly moisten the very center with a dab of water.
STEP 7: Gently pick up one corner and bend it in so that the point reaches the center. Press down gently so the point sticks to the center.
STEP 8: Repeat Step 7, folding in every other corner until you have a pinwheel shape.
STEP 9: Roll or cut a tiny ball of white fondant for the center. Attach to center with a light drop of water, if needed. Push down gently to seal. Let pinwheels dry on parchment paper overnight or until completely dry and firm. Place on top of cupcakes when ready to serve.
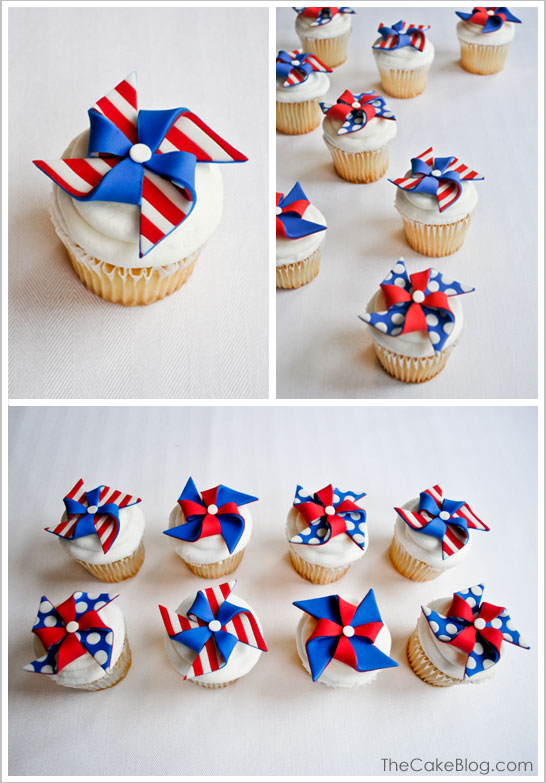
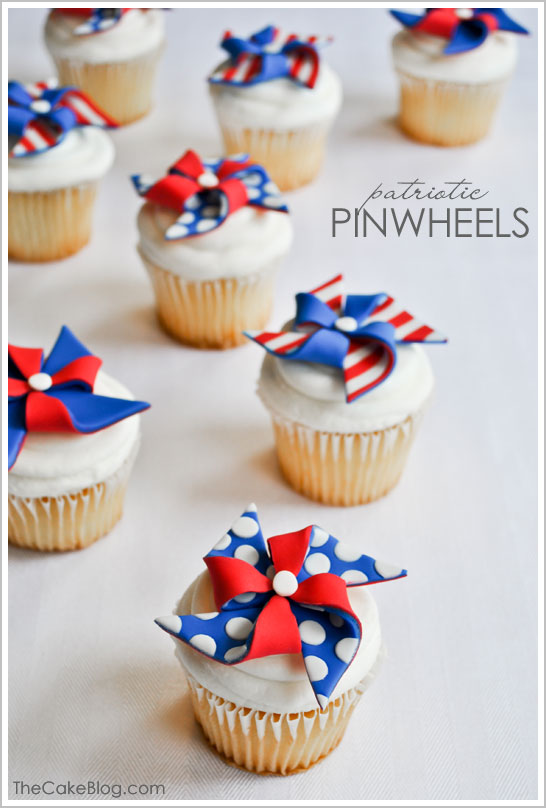
Whether you stick to the solid colors or go bold with the stripes and polka dots, I hope my Patriotic Pinwheel Cupcakes are a fun addition to your Independence Day!
http://thecakeblog.com/2012/07/diy-patriotic-pinwheel-cupcakes.html
http://tienda.cupcakesytartas.com/product.php?id_product=237

Nessun commento:
Posta un commento