I don't own a Kopykake. I wish I did. It would make my life so much easier. But, until I stop dragging my feet and just order one, I'll continue to use this tracing paper and edible ink marker method. So, for those of you who don't have a Kopykake, you can use this method to transfer pretty much any design onto a cookie.
...
...
Trace your image onto a piece of tracing paper using an edible ink marker.
...
Place the image on top of an iced cookie that has been allowed to dry completely.
...
Go over the image again with the edible ink marker. Use a little pressure to be sure that the image transfers onto the icing. You don't have to turn the image over for this process because the ink will bleed through the tracing paper.
...
You'll have a rough outline of your image, like this.
...
Outline and fill in your image. I'm using a tip 1 and 10 count icing.
...
You can use a scribe or a toothpick to evenly distribute the icing and fix the edges.
...
...
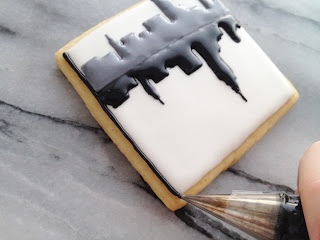
Pipe a border using the thinned black icing and tip 1.
...
...
..
You can see the entire NYC set here.
...
For video tutorials, visit my YouTube channel at www.youtube.com/sweetambscookies
http://www.amberspiegel.blogspot.com/2012/06/nyc-cookie-how-to.html
NYC Cookies
I made these NYC designs by first flooding the cookies in white royal icing and letting them dry completely. Then, I traced the designs onto the cookies using an edible ink marker and piped over the lines with a tip 1 and thinned royal icing in black, white and gray. The black outline was added at the end.
For video tutorials on cookie decorating, visit my YouTube channel: www.youtube.com/sweetambscookies
http://amberspiegel.blogspot.com/2012/05/i-made-these-nyc-designs-by-first.html


Nessun commento:
Posta un commento