I
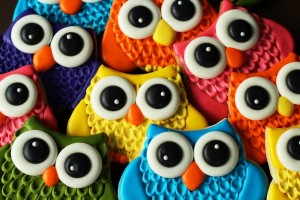
think owls are super cute! We have them at our house and I can hear
them all night long hooting at each other. It is really neat and kinda
eerie at the same time. As I sat on the porch Friday night drinking a
cup of coffee, I heard several of them and decided to make some cookies.
I don’t have an owl cutter so I had to come up with something on my
own. I am pretty sure every cookier owns these cutters.
Can you tell what cutters I used? Would you believe it is and egg cutter and a heart cutter? Believe it!
Supplies:
Use any colors you want for this but here is the list of colors I used.
AmeriColor Sky Blue Thick & Flood Icing
AmeriColor Electric Yellow+ a tiny bit of Wilton Buttercup Yellow Thick & Flood Icing
Wilton Juniper Green + Americolor Electric Green Thick & Flood Icing
AmeriColor Soft Pink Thick & Flood Icing
Wilton Violet Thick & Flood Icing
White Outline Icing
AmeriColor Electric Orange Outline Icing
Black Outline Icing
White Pearlized Sugar Pearls
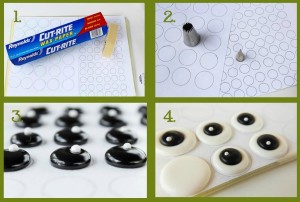
- To make the Royal Icing Transfer eyes, you will need, wax paper, tape a flat surface to pipe on and a pattern if you want your eyes to be the same size. Click here for my other RI Transfer tutorial.
- I traced 2 different sized decorating tips for the eyes. The large one is a cupcake tip and it is #9FT and the small one is a #2 PME. You can also make a template on your computer and print it off. Remember, when you make RI Transfers, make extra because sometimes they break.
- First, pipe the small circles black. While they are wet, add a White Pearlized Sugar Pearls for the sparkle in the eyes. Let them dry completely. When they dry, carefully remove them from the wax paper.
- Pipe the large circle white. While the white is still wet, drop the black part of the eye in the center. The good thing is, you can make these a few days ahead of time. The bad thing is these have to dry completely before you start your owls.
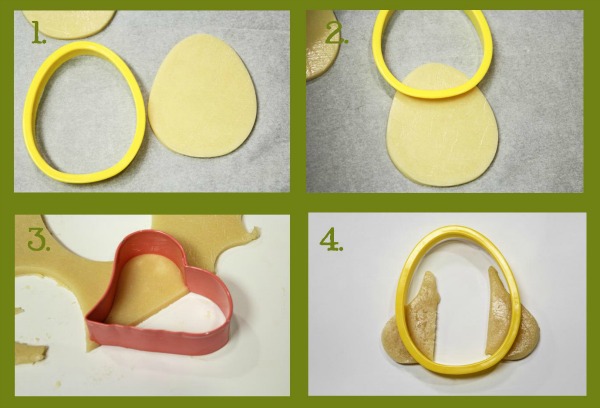
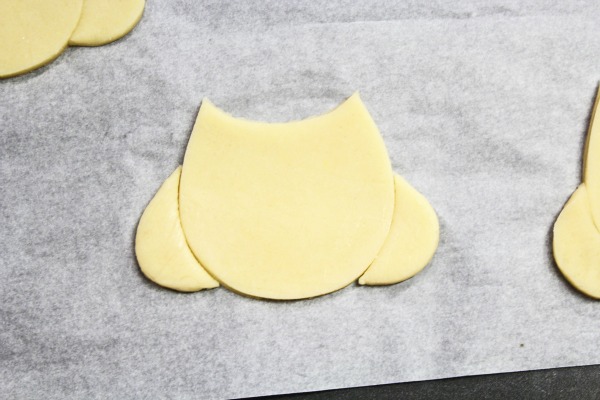
- I uses an egg cutter from a bag of cutters I got at Wal-Mart at Easter. You can use any egg cutter you have.
- Once you cut out the egg, move the bottom of the egg cutter to the top of the egg and cut it off. The lower you cut, the fatter your owl will be.
- Cut the wings out with a heart cutter. You need 2-half hearts. Mine was a weird shape so I cut 2 and flipped one over.
- Once you have your heart wings, trim them with the egg cutter.
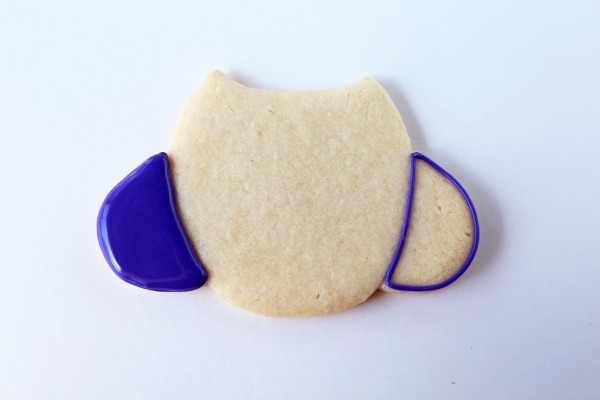
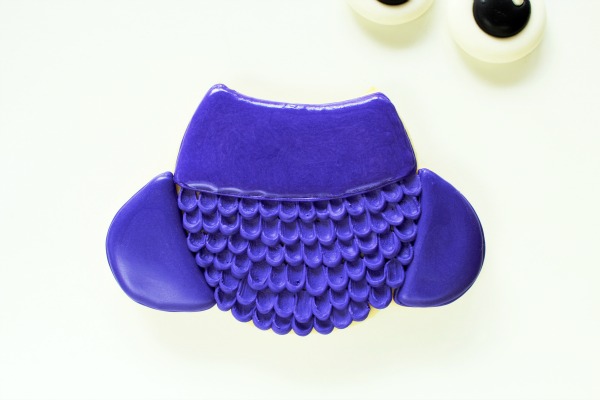
With the purple flood icing, outlining and flood the wings.
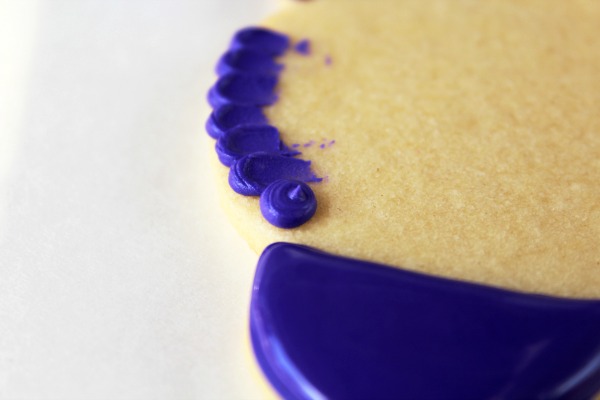
With
the thick icing, make some dots along the bottom of the owls body. I
uses a PME 2.5 tip but, a 3 would work also. The size of your “feathers”
depends on the size of your egg. If you use a mini egg, you need
smaller dots. If you have a larger egg, then you will need larger dots.
That was a really long way to tell you to find the tip that works best
for your owl!
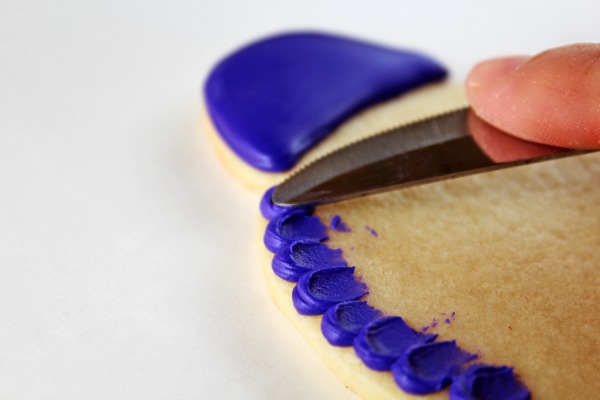
Next, with a butter knife, start in the center of the dot and pull down toward the cookie.
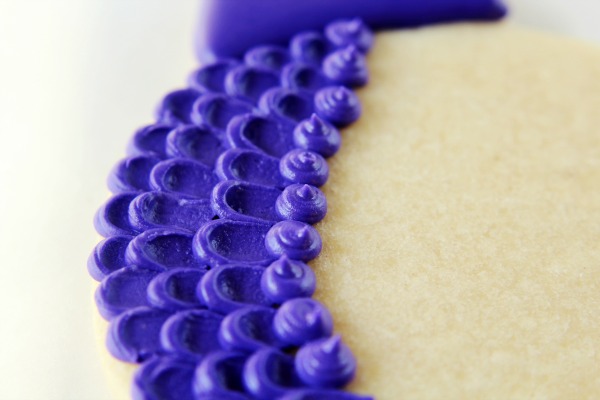 Repeat the dots overlapping them slightly and continue up the body.
Continue
the rows until you are happy. I did my owls different ways. Some of the
rows stopped at the top of the wings and on other owls, I continued and
made thin eyebrows. I wanted them to have different personalities.
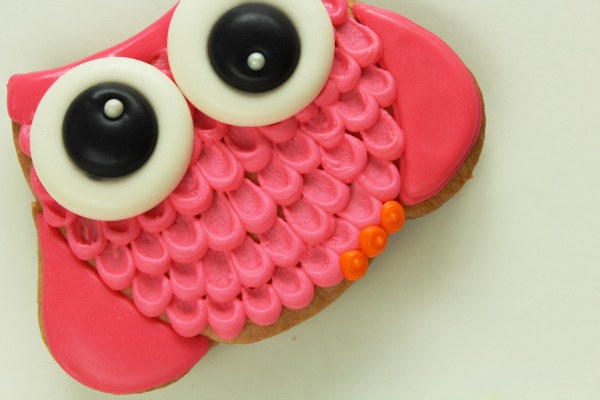
Once you either make the feather and add the face or the eyebrow, add the RI Transfer eyes.
This is one of the owls with the thinner eyebrows.
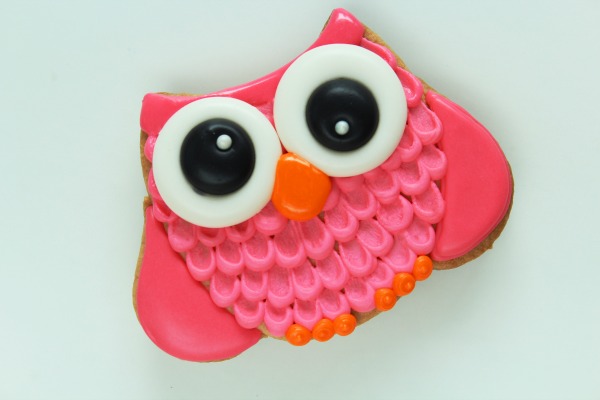
Next, with the orange thick icing, make three little toes on each foot.
Then, with the orange thick icing, add the nose.
There
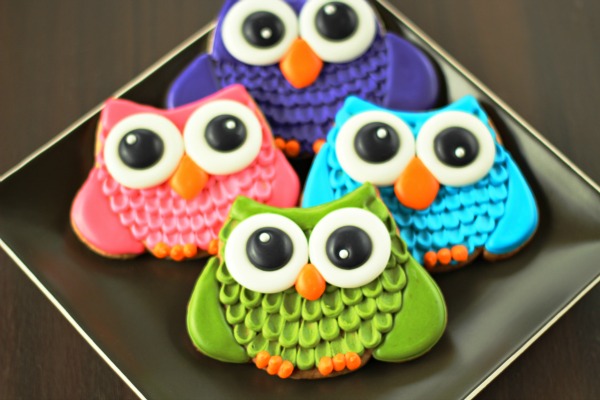
you have it! Owls with ruffled feathered tummies. I love texture on my
cookies. I want to make more cookies using this technique and already
have a few ideas. I have seen this technique on cakes and wanted to try
it with cookies and Royal Icing. I really like the way they turned out
and can’t wait to make some in fun Halloween colors for the kids in my
neighborhood.
Here are some other owl cookies.
Sweetopia- How to make Decorated Owl Cookies
Sweet Sugar Belle- Owl Always Love You Cookies
Sweet Sugar Belle- Pinterested Cookie-d {Owl Cookies}
Happy Creating,


Nessun commento:
Posta un commento